Discover the Ultimate Thai Fried Chicken Sandwich
There’s something inherently comforting about biting into a crispy, juicy Thai Fried Chicken Sandwich. It’s like a warm hug from the kitchen, blending exotic flavors with familiar textures, and every bite tells a story. In our family, we’ve always believed that food is more than just something you eat—it’s a way to connect, to create, and to share love. I remember the first time I tried my hand at making this sandwich, inspired by a bustling Thai street food market I visited on a rare weekend getaway. As I stood in my kitchen, balancing spices with a toddler tugging at my apron strings, I realized this was more than a recipe—it was a moment to savor, much like the ones I cherished with my grandmother.
Table of Contents
Why You’ll Love This Thai Fried Chicken Sandwich
This Thai Fried Chicken Sandwich is a delightful twist on a classic favorite, offering a burst of flavors that dance on your palate. It brings together the crunchiness of perfectly fried chicken with the tang of pickled vegetables and the heat of Thai spices—an irresistible combination that will make this a staple in your home. Whether you’re a busy parent like me or just someone who loves a good sandwich, this recipe is approachable, quick, and a true crowd-pleaser. It’s perfect for a family dinner or a casual weekend lunch, creating new memories with each delicious bite.
Ingredients You’ll Need for This Thai Fried Chicken Sandwich
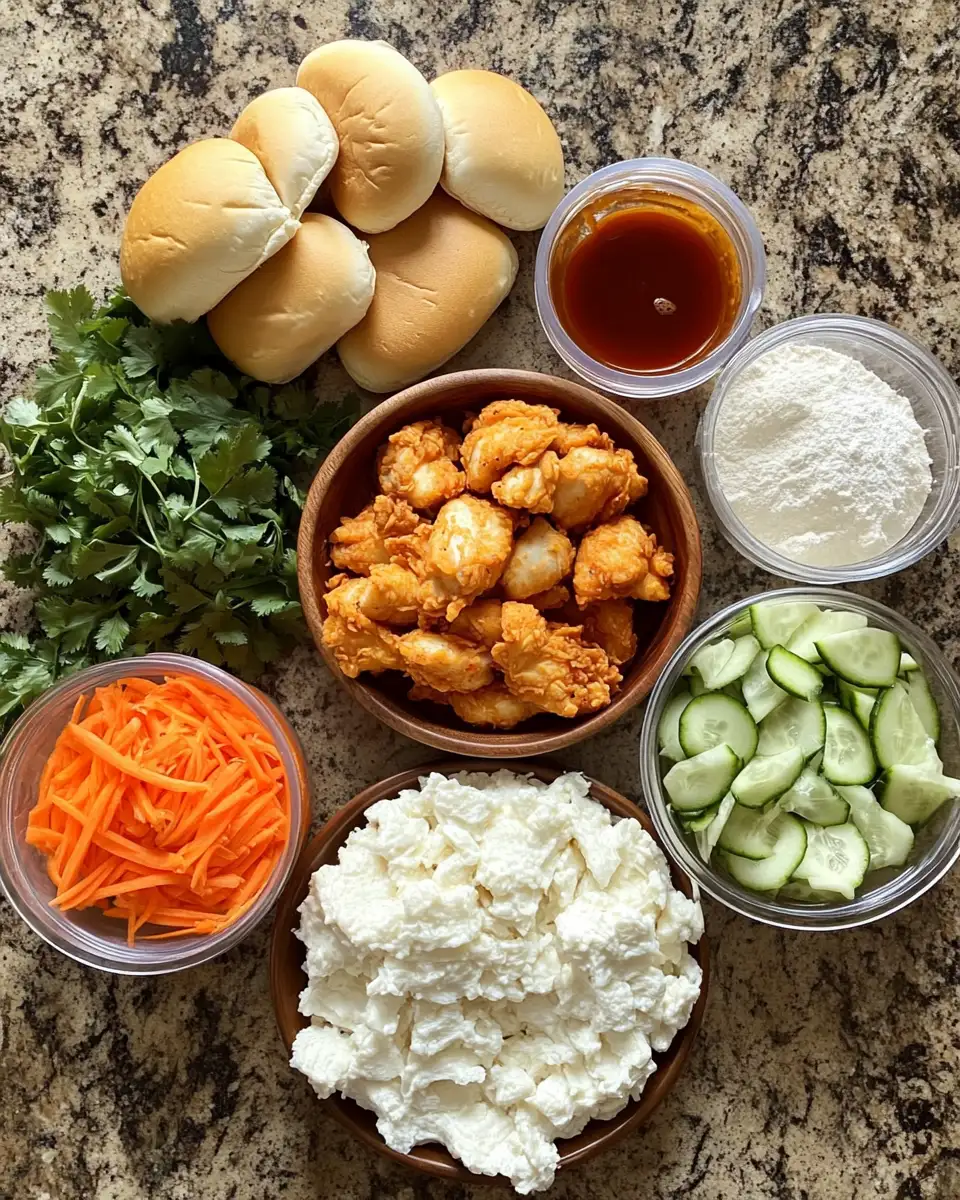
- 4 boneless, skinless chicken thighs
- 1 cup buttermilk
- 2 tablespoons fish sauce
- 1 tablespoon soy sauce
- 1 cup all-purpose flour
- 1/2 cup cornstarch
- 2 teaspoons ground ginger
- 2 teaspoons garlic powder
- 1 teaspoon paprika
- 1 teaspoon cayenne pepper
- Vegetable oil for frying
- 4 brioche buns
- 1 cup shredded carrot
- 1/2 cup thinly sliced cucumber
- 1/4 cup rice vinegar
- 1 tablespoon sugar
- Fresh cilantro leaves for garnish
- Optional: Sriracha or your favorite chili sauce
Nutrition Facts
- Calories: 560 per serving
- Protein: 28g
- Fat: 20g
- Carbohydrates: 65g
- Fiber: 3g
- Sugar: 8g
- Sodium: 1150mg

Crispy Delight: Discover the Ultimate Thai Fried Chicken Sandwich
Learn how to make delicious Thai Fried Chicken Sandwich. Easy recipe with step-by-step instructions.
- Total Time: 45 minutes
- Yield: 4 servings 1x
Ingredients
- 4 boneless, skinless chicken thighs
- 1 cup buttermilk
- 2 tablespoons fish sauce
- 1 tablespoon soy sauce
- 1 cup all-purpose flour
- 1/2 cup cornstarch
- 2 teaspoons ground ginger
- 2 teaspoons garlic powder
- 1 teaspoon paprika
- 1 teaspoon cayenne pepper
- Vegetable oil for frying
- 4 brioche buns
- 1 cup shredded carrot
- 1/2 cup thinly sliced cucumber
- 1/4 cup rice vinegar
- 1 tablespoon sugar
- Fresh cilantro leaves for garnish
- Optional: Sriracha or your favorite chili sauce
Instructions
- In a large bowl, combine the buttermilk, fish sauce, and soy sauce. Add the chicken thighs, ensuring they’re fully submerged. Cover and refrigerate for at least 1 hour, or overnight for deeper flavor.
- In another bowl, mix together the flour, cornstarch, ground ginger, garlic powder, paprika, and cayenne pepper.
- Heat the vegetable oil in a large skillet over medium-high heat until it reaches 350°F. A tip from my grandmother: drop a small piece of bread into the oil—if it sizzles and browns, it’s ready.
- Remove the chicken from the marinade, letting any excess drip off, then dredge each piece in the flour mixture until fully coated.
- Fry the chicken in the hot oil for about 6-8 minutes per side, or until golden brown and cooked through. Transfer to a wire rack to drain and stay crispy.
- While the chicken is frying, prepare the pickled vegetables. Combine the shredded carrot, cucumber, rice vinegar, and sugar in a small bowl. Let it sit for at least 10 minutes to absorb the flavors.
- To assemble the sandwiches, toast the brioche buns lightly. Place a piece of fried chicken on the bottom half, top with pickled vegetables, fresh cilantro, and a drizzle of Sriracha if desired. Close with the top bun and serve immediately.
- Prep Time: 15 minutes
- Cook Time: 30 minutes
- Category: Main Dish
- Method: Cooking
- Cuisine: International
Steps to Create Your Thai Fried Chicken Sandwich
- In a large bowl, combine the buttermilk, fish sauce, and soy sauce. Add the chicken thighs, ensuring they’re fully submerged. Cover and refrigerate for at least 1 hour, or overnight for deeper flavor.
- In another bowl, mix together the flour, cornstarch, ground ginger, garlic powder, paprika, and cayenne pepper.
- Heat the vegetable oil in a large skillet over medium-high heat until it reaches 350°F. A tip from my grandmother: drop a small piece of bread into the oil—if it sizzles and browns, it’s ready.
- Remove the chicken from the marinade, letting any excess drip off, then dredge each piece in the flour mixture until fully coated.
- Fry the chicken in the hot oil for about 6-8 minutes per side, or until golden brown and cooked through. Transfer to a wire rack to drain and stay crispy.
- While the chicken is frying, prepare the pickled vegetables. Combine the shredded carrot, cucumber, rice vinegar, and sugar in a small bowl. Let it sit for at least 10 minutes to absorb the flavors.
- To assemble the sandwiches, toast the brioche buns lightly. Place a piece of fried chicken on the bottom half, top with pickled vegetables, fresh cilantro, and a drizzle of Sriracha if desired. Close with the top bun and serve immediately.
Tips for Making the Best Thai Fried Chicken Sandwich
For the crispiest chicken, make sure your oil is at the right temperature before frying. Too cool, and the chicken absorbs oil; too hot, and it burns. Using a thermometer can be a game-changer here. Also, don’t overcrowd the pan—fry in batches if necessary. This was a lesson I learned the hard way, trying to rush through a busy school night dinner.
Serving Suggestions and Pairings

This Thai Fried Chicken Sandwich pairs wonderfully with a side of sweet potato fries or a light cucumber salad. If you’re in the mood for a heartier meal, serve it alongside a bowl of spicy Thai soup. Don’t forget a chilled glass of Thai iced tea to complete the culinary journey. Each pairing enhances the sandwich’s flavors, creating a meal that feels like a mini-vacation on a plate.
Storage and Reheating Tips
If you have leftovers (a rare occurrence in our house!), store the fried chicken separately from the buns and pickled veggies. Keep the chicken in an airtight container in the fridge for up to 3 days. To reheat, place it in a preheated oven at 350°F for about 10 minutes to regain its crispiness. The pickled vegetables can be stored in the fridge for up to a week, maintaining their tangy freshness.
Frequently Asked Questions
What are the main ingredients for Thai Fried Chicken Sandwich?
The main ingredients for Thai Fried Chicken Sandwich include the items listed in our ingredients section above. Each ingredient plays a crucial role in achieving the perfect flavor and texture.
How long does it take to make Thai Fried Chicken Sandwich?
The total time to make Thai Fried Chicken Sandwich includes both preparation and cooking time. Check the recipe card above for exact timing details.
Can I make Thai Fried Chicken Sandwich ahead of time?
Yes, Thai Fried Chicken Sandwich can often be prepared in advance. Store it properly in an airtight container in the refrigerator and consume within the recommended timeframe.
What can I serve with Thai Fried Chicken Sandwich?
Thai Fried Chicken Sandwich pairs well with various sides and accompaniments. Consider the serving suggestions mentioned in the recipe for the best dining experience.
Is Thai Fried Chicken Sandwich suitable for special diets?
Depending on the ingredients used, Thai Fried Chicken Sandwich may be adapted for various dietary needs. Check the ingredients list and consider substitutions as needed for your dietary requirements.
Final Thoughts
Creating this Thai Fried Chicken Sandwich at home is more than just cooking—it’s an experience that brings a little slice of culinary adventure to your kitchen. Each ingredient, each step, and each moment of savoring the final dish is a celebration of the everyday magic that cooking brings into our lives. I hope you enjoy making and sharing this recipe as much as I have, creating your own stories and memories with every delicious bite. Here’s to keeping the tradition of love, laughter, and good food alive in our homes.