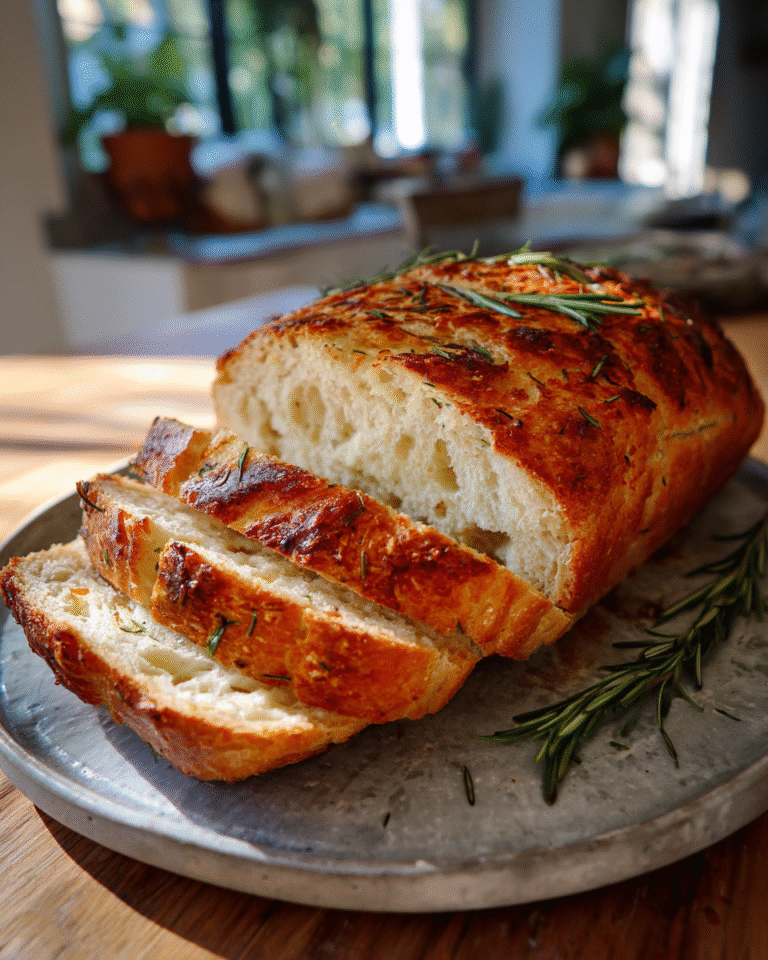
No-Knead Roasted Garlic Rosemary Bread That Will Elevate Your Baking Game
There’s something truly magical about the smell of fresh bread baking in the oven—especially when it’s infused with the warm, earthy notes of roasted garlic and fragrant rosemary. My No-Knead Roasted Garlic Rosemary Bread has become a staple in our home, not just because it tastes incredible, but because it brings a little calm and connection to our busy days. I remember my grandmother patiently showing me how simple ingredients could come together to create something unforgettable, and this recipe is a nod to those cherished moments. Whether you’re a seasoned baker or someone who’s just starting to explore the joys of homemade bread, this no-knead version is approachable, comforting, and a perfect way to slow down and savor the simple pleasures of life.
Table of Contents
Why You’ll Love This No-Knead Roasted Garlic Rosemary Bread
When life gets hectic, like it often does in my house, I need recipes that feel special but don’t demand hours in the kitchen. This No-Knead Roasted Garlic Rosemary Bread hits that sweet spot. It requires minimal hands-on time, no fancy equipment, and yet delivers that bakery-style crust and tender crumb we all crave. The roasted garlic adds a subtle sweetness and depth, while the rosemary offers a fresh, herbal lift that transforms this loaf from ordinary to extraordinary.
What I love most is that this bread isn’t just food—it’s a way to gather around the table and share stories. From the first time I made it, standing on a stool in my grandmother’s kitchen, to the many evenings after work when this loaf was our family’s centerpiece, it’s helped me slow down and connect. It’s proof that sometimes the best meals are the simplest ones, made with love and a little patience.
Ingredients You’ll Need for This No-Knead Roasted Garlic Rosemary Bread

- 3 cups all-purpose flour (you can substitute half with whole wheat flour for a heartier loaf)
- 1 teaspoon instant yeast
- 1 ½ teaspoons salt
- 1 ½ cups warm water (about 110°F)
- 1 whole head of garlic
- 2 tablespoons fresh rosemary, finely chopped (dried rosemary can be used, but fresh really brightens the flavor)
- 2 tablespoons olive oil, plus extra for drizzling
- Optional: a sprinkle of sea salt on top before baking for extra crunch
Nutrition Facts
- Calories: Approximately 220 per 1/8 loaf serving
- Protein: 6g
- Fat: 3.5g (mostly from olive oil and garlic)
- Carbohydrates: 40g
- Fiber: 2g (higher if using whole wheat flour)
- Sugar: 1g (naturally occurring from garlic and flour)
- Sodium: 330mg (primarily from added salt)
No-Knead Roasted Garlic Rosemary Bread That Will Elevate Your Baking Game
Learn how to make delicious No-Knead Roasted Garlic Rosemary Bread. Easy recipe with step-by-step instructions.
- Total Time: 45 minutes
- Yield: 4 servings 1x
Ingredients
- 3 cups all-purpose flour (you can substitute half with whole wheat flour for a heartier loaf)
- 1 teaspoon instant yeast
- 1 ½ teaspoons salt
- 1 ½ cups warm water (about 110°F)
- 1 whole head of garlic
- 2 tablespoons fresh rosemary, finely chopped (dried rosemary can be used, but fresh really brightens the flavor)
- 2 tablespoons olive oil, plus extra for drizzling
- Optional: a sprinkle of sea salt on top before baking for extra crunch
Instructions
- Begin by roasting your garlic. Preheat your oven to 400°F. Slice off the top of the garlic head to expose the cloves, drizzle with olive oil, wrap in foil, and roast for about 30-35 minutes until soft and fragrant. This step fills your kitchen with that irresistible aroma I always associate with comfort and home.
- While the garlic roasts, mix the flour, instant yeast, and salt together in a large bowl. I like to whisk these dry ingredients first to get everything evenly distributed—something my grandmother always emphasized to me.
- Once the garlic is cool enough to handle, squeeze the softened cloves out of their skins and mash them with a fork.
- Add the mashed roasted garlic, chopped rosemary, olive oil, and warm water to the flour mixture. Stir everything together with a wooden spoon or your hand until you have a shaggy, sticky dough. Resist the urge to knead! This dough is meant to be loose and a bit messy.
- Cover the bowl tightly with plastic wrap or a clean kitchen towel and let it rest at room temperature for 12 to 18 hours. This slow fermentation is what gives the bread its wonderful texture and flavor. I usually prepare this the night before and wake up to a bubbly, alive dough—one of my favorite sights in the kitchen.
- When ready to bake, preheat your oven to 450°F. Place a heavy Dutch oven or oven-safe pot with a lid inside to heat up as well. This mimics a professional steam oven and helps develop a crusty exterior.
- Carefully turn the dough out onto a well-floured surface. With floured hands, shape it gently into a round loaf, folding the edges underneath to create surface tension. If you like, sprinkle a little sea salt and some rosemary on top.
- Remove the hot Dutch oven from the oven (be careful!) and place the dough inside. Cover with the lid and bake for 30 minutes. Then remove the lid and bake for an additional 15 minutes to get that perfect golden crust.
- Once baked, transfer the bread to a wire rack and let it cool completely before slicing. This step is crucial—it helps the crumb set and makes slicing easier. This waiting period always tests my patience, but it’s worth it every time.
- Prep Time: 15 minutes
- Cook Time: 30 minutes
- Category: Main Dish
- Method: Cooking
- Cuisine: International
Steps to Create Your No-Knead Roasted Garlic Rosemary Bread
- Begin by roasting your garlic. Preheat your oven to 400°F. Slice off the top of the garlic head to expose the cloves, drizzle with olive oil, wrap in foil, and roast for about 30-35 minutes until soft and fragrant. This step fills your kitchen with that irresistible aroma I always associate with comfort and home.
- While the garlic roasts, mix the flour, instant yeast, and salt together in a large bowl. I like to whisk these dry ingredients first to get everything evenly distributed—something my grandmother always emphasized to me.
- Once the garlic is cool enough to handle, squeeze the softened cloves out of their skins and mash them with a fork.
- Add the mashed roasted garlic, chopped rosemary, olive oil, and warm water to the flour mixture. Stir everything together with a wooden spoon or your hand until you have a shaggy, sticky dough. Resist the urge to knead! This dough is meant to be loose and a bit messy.
- Cover the bowl tightly with plastic wrap or a clean kitchen towel and let it rest at room temperature for 12 to 18 hours. This slow fermentation is what gives the bread its wonderful texture and flavor. I usually prepare this the night before and wake up to a bubbly, alive dough—one of my favorite sights in the kitchen.
- When ready to bake, preheat your oven to 450°F. Place a heavy Dutch oven or oven-safe pot with a lid inside to heat up as well. This mimics a professional steam oven and helps develop a crusty exterior.
- Carefully turn the dough out onto a well-floured surface. With floured hands, shape it gently into a round loaf, folding the edges underneath to create surface tension. If you like, sprinkle a little sea salt and some rosemary on top.
- Remove the hot Dutch oven from the oven (be careful!) and place the dough inside. Cover with the lid and bake for 30 minutes. Then remove the lid and bake for an additional 15 minutes to get that perfect golden crust.
- Once baked, transfer the bread to a wire rack and let it cool completely before slicing. This step is crucial—it helps the crumb set and makes slicing easier. This waiting period always tests my patience, but it’s worth it every time.
Tips for Making the Best No-Knead Roasted Garlic Rosemary Bread
From my years of balancing a busy family life and kitchen, I’ve learned a few tricks that make this bread shine every time:
- Use quality ingredients: Fresh rosemary and good olive oil really elevate the flavor. When I first started baking, I underestimated this, but now it’s a non-negotiable.
- Don’t skip the slow rise: The long fermentation is what makes this bread so flavorful and tender. It’s a moment to pause and let the dough do its work—something I find grounding amid the chaos of family life.
- Flour your hands and surfaces generously: This dough is sticky, so keeping things floured helps you shape it without frustration.
- Be patient with cooling: I know it’s tempting to slice immediately, but waiting allows the steam inside to settle, giving you a better texture.
- Experiment with mix-ins: I’ve occasionally added chopped olives or sun-dried tomatoes for a twist—feel free to make it your own.
Serving Suggestions and Pairings

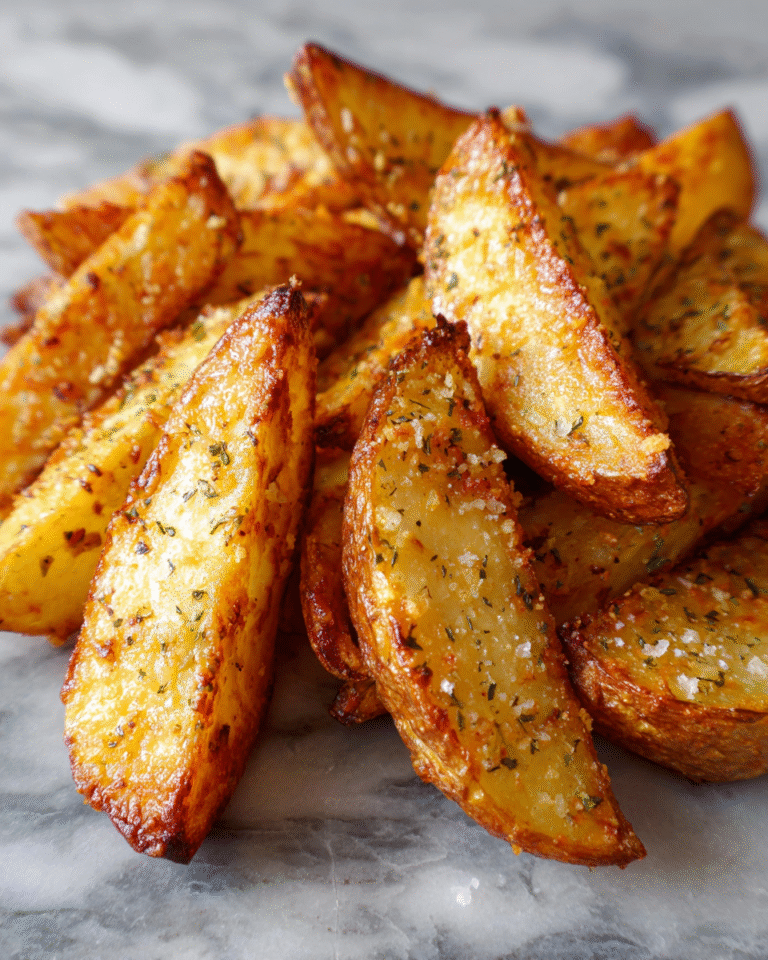
This No-Knead Roasted Garlic Rosemary Bread is incredibly versatile, and in my home, it often stars as a sidekick to our meals or even as a snack on its own. Here are some ways we enjoy it: Learn more: Crispy Herb Roasted Potatoes That Will Steal the Show
- Sliced warm with a pat of butter and a sprinkle of flaky sea salt—simple, yet soul-satisfying.
- Alongside a hearty soup like tomato basil or butternut squash, perfect for cozy family dinners.
- Toasted with avocado and a drizzle of olive oil for a quick breakfast or lunch when time is tight.
- As a base for bruschetta topped with fresh tomatoes, basil, and mozzarella—a favorite when friends come over.
- Paired with a cheese board featuring creamy brie, tangy goat cheese, and a handful of olives for special occasions.
Serving this bread always sparks conversation around our table—it’s those moments of shared enjoyment and connection that remind me why I started RecipeChic in the first place.
Storage and Reheating Tips
One of the joys of making this bread is having it around for several days, perfect for quick snacks or last-minute meals. Here’s how I keep it fresh and delicious:
- Room temperature storage: Keep the bread wrapped loosely in a clean kitchen towel or paper bag at room temperature for up to 2 days. Avoid plastic bags, which can make the crust soggy.
- Freezing: Slice the bread before freezing, then wrap individual slices or the whole loaf tightly in plastic wrap and foil. It freezes beautifully for up to 3 months.
- Reheating: To revive that crusty exterior, I like to pop slices in a toaster or bake the whole loaf at 350°F for 10-15 minutes. Adding a light mist of water before reheating helps mimic the original steam effect.
These little storage tips have saved me on many hectic days when I want homemade bread without the fuss.
Frequently Asked Questions
What are the main ingredients for No-Knead Roasted Garlic Rosemary Bread?
The main ingredients for No-Knead Roasted Garlic Rosemary Bread include the items listed in our ingredients section above. Each ingredient plays a crucial role in achieving the perfect flavor and texture.
How long does it take to make No-Knead Roasted Garlic Rosemary Bread?
The total time to make No-Knead Roasted Garlic Rosemary Bread includes both preparation and cooking time. Check the recipe card above for exact timing details.
Can I make No-Knead Roasted Garlic Rosemary Bread ahead of time?
Yes, No-Knead Roasted Garlic Rosemary Bread can often be prepared in advance. Store it properly in an airtight container in the refrigerator and consume within the recommended timeframe.
What can I serve with No-Knead Roasted Garlic Rosemary Bread?
No-Knead Roasted Garlic Rosemary Bread pairs well with various sides and accompaniments. Consider the serving suggestions mentioned in the recipe for the best dining experience.
Is No-Knead Roasted Garlic Rosemary Bread suitable for special diets?
Depending on the ingredients used, No-Knead Roasted Garlic Rosemary Bread may be adapted for various dietary needs. Check the ingredients list and consider substitutions as needed for your dietary requirements.
Final Thoughts
Making this No-Knead Roasted Garlic Rosemary Bread has been more than just a recipe for me—it’s a link to my past, a way to slow down, and a daily reminder that food can be a beautiful expression of love. From standing on my grandmother’s kitchen stool, watching her hands transform simple ingredients into magic, to now sharing this loaf with my own family, each slice carries a story.
Whether you’re feeding your family, hosting friends, or just treating yourself, I hope this bread brings warmth and connection to your table like it has to mine. Remember, cooking doesn’t have to be complicated to be meaningful. Sometimes, the best recipes are the ones that invite you to pause, savor, and share.
So, grab your mixing bowl, let the dough rest, and enjoy the journey of making this special bread. I can’t wait to hear how it becomes a part of your family’s story, just as it has with mine.