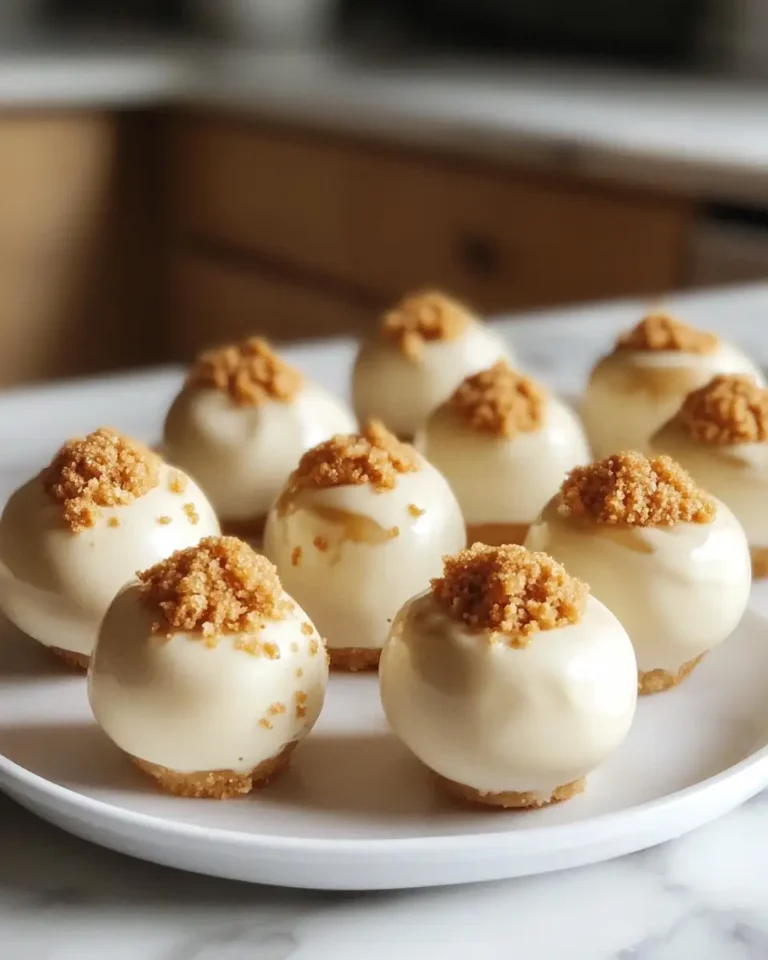
No-Bake Peanut Butter Cheesecake Balls: A Bite-Sized Dessert Delight
There’s something magical about creating a delicious treat with minimal fuss, and these No-Bake Peanut Butter Cheesecake Balls are a testament to that magic. I remember the first time I stumbled upon a no-bake recipe while rushing to put together a treat for a family gathering. It felt like discovering a culinary shortcut that didn’t skimp on flavor or satisfaction. These cheesecake balls are a perfect blend of creamy, nutty goodness, reminiscent of those spontaneous kitchen adventures I cherish so much.
Table of Contents
Why You’ll Love This No-Bake Peanut Butter Cheesecake Balls
Imagine a dessert that requires no oven time, minimal ingredients, and ends up being a showstopper at any gathering. That’s exactly what these No-Bake Peanut Butter Cheesecake Balls offer. They are the epitome of comfort and ease—a throwback to my grandmother’s simple yet decadent kitchen creations. Every bite carries a nostalgic note of peanut butter’s rich texture, seamlessly combined with creamy cheesecake, making them irresistible. Whether you’re a busy mom, like me, seeking quick solutions, or someone who simply loves indulging in rich flavors, these cheesecake balls will capture your heart.
Ingredients You’ll Need for This No-Bake Peanut Butter Cheesecake Balls
Let’s gather those pantry staples and some fresh ingredients to bring this delightful dessert to life. Here’s what you’ll need:
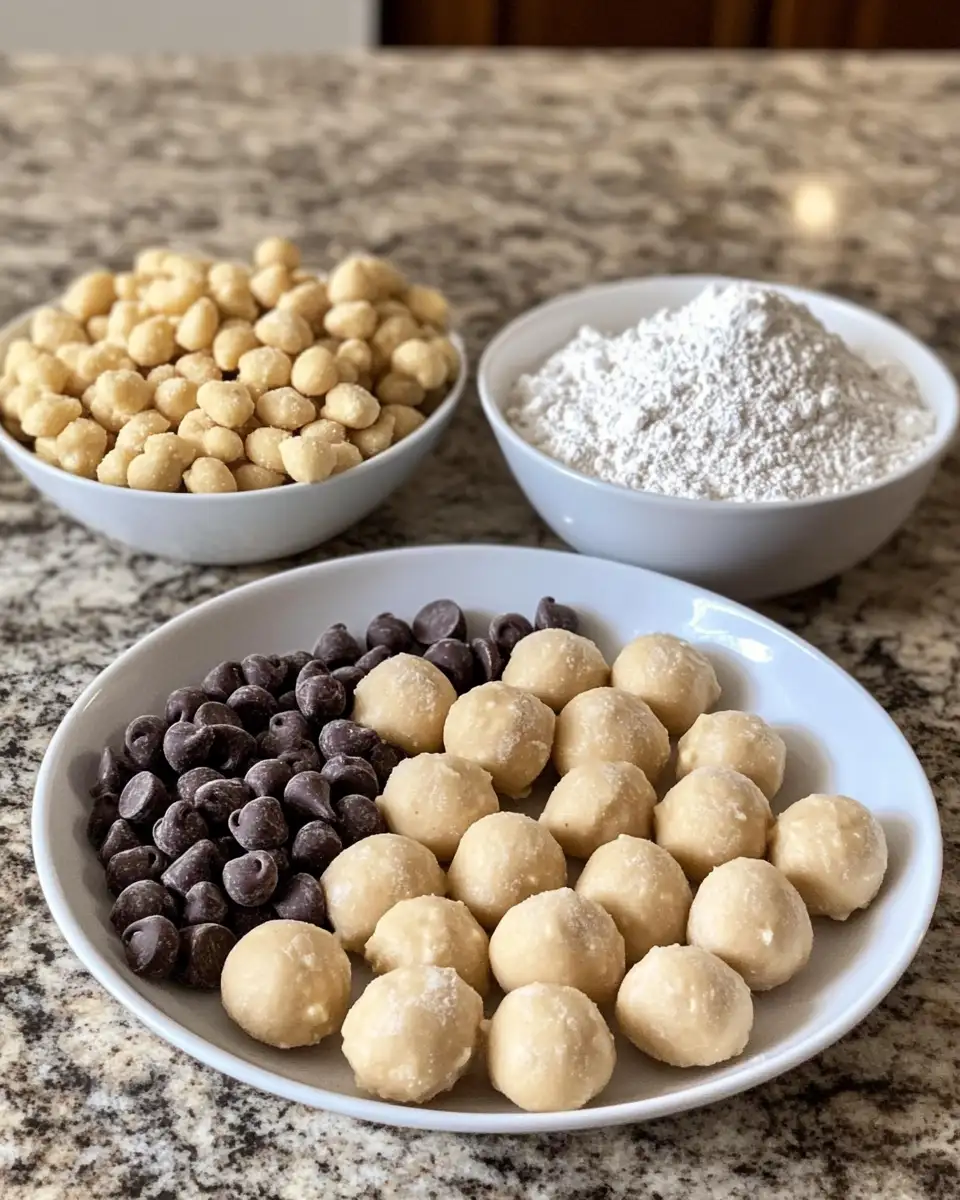
- 1 cup creamy peanut butter
- 1 package (8 oz) cream cheese, softened
- 1 cup graham cracker crumbs
- 1 cup powdered sugar
- 1 teaspoon vanilla extract
- 1/2 cup mini chocolate chips (optional, but a favorite in our house!)
- 1 cup of crushed peanuts (for rolling)
Substitutions are always welcome in my kitchen. Feel free to swap creamy peanut butter for crunchy if you prefer a bit more texture. For a nut-free version, sunflower seed butter works wonders!
Nutrition Facts
Understanding the nutritional content of our meals is something I’ve grown to appreciate over the years, especially while balancing a family diet. Here’s what you’ll find in each serving of these delectable bites:
- Calories: 180 per ball
- Protein: 4g
- Fat: 12g
- Carbohydrates: 14g
- Fiber: 1g
- Sugar: 9g
- Sodium: 120mg
No-Bake Peanut Butter Cheesecake Balls: A Bite-Sized Dessert Delight
Learn how to make delicious No-Bake Peanut Butter Cheesecake Balls. Easy recipe with step-by-step instructions.
- Total Time: 45 minutes
- Yield: 4 servings 1x
Ingredients
Let’s gather those pantry staples and some fresh ingredients to bring this delightful dessert to life. Here’s what you’ll need:
- 1 cup creamy peanut butter
- 1 package (8 oz) cream cheese, softened
- 1 cup graham cracker crumbs
- 1 cup powdered sugar
- 1 teaspoon vanilla extract
- 1/2 cup mini chocolate chips (optional, but a favorite in our house!)
- 1 cup of crushed peanuts (for rolling)
Substitutions are always welcome in my kitchen. Feel free to swap creamy peanut butter for crunchy if you prefer a bit more texture. For a nut-free version, sunflower seed butter works wonders!
Instructions
Let’s dive into the fun part—making these scrumptious treats. Remember, cooking is a journey, not just a destination, so enjoy each step!
- In a large mixing bowl, combine the peanut butter and softened cream cheese. Beat until smooth and creamy, about 2-3 minutes.
- Add in the graham cracker crumbs, powdered sugar, and vanilla extract. Mix until all ingredients are well incorporated.
- Gently fold in the mini chocolate chips if you’re using them. This step always puts a smile on my kids’ faces!
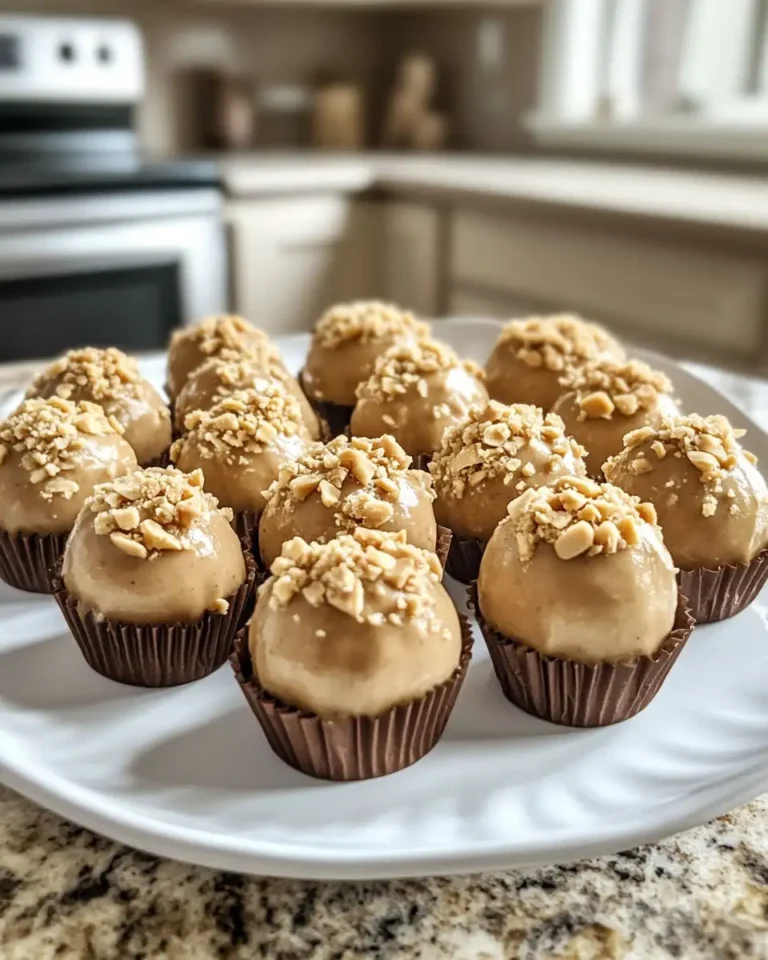
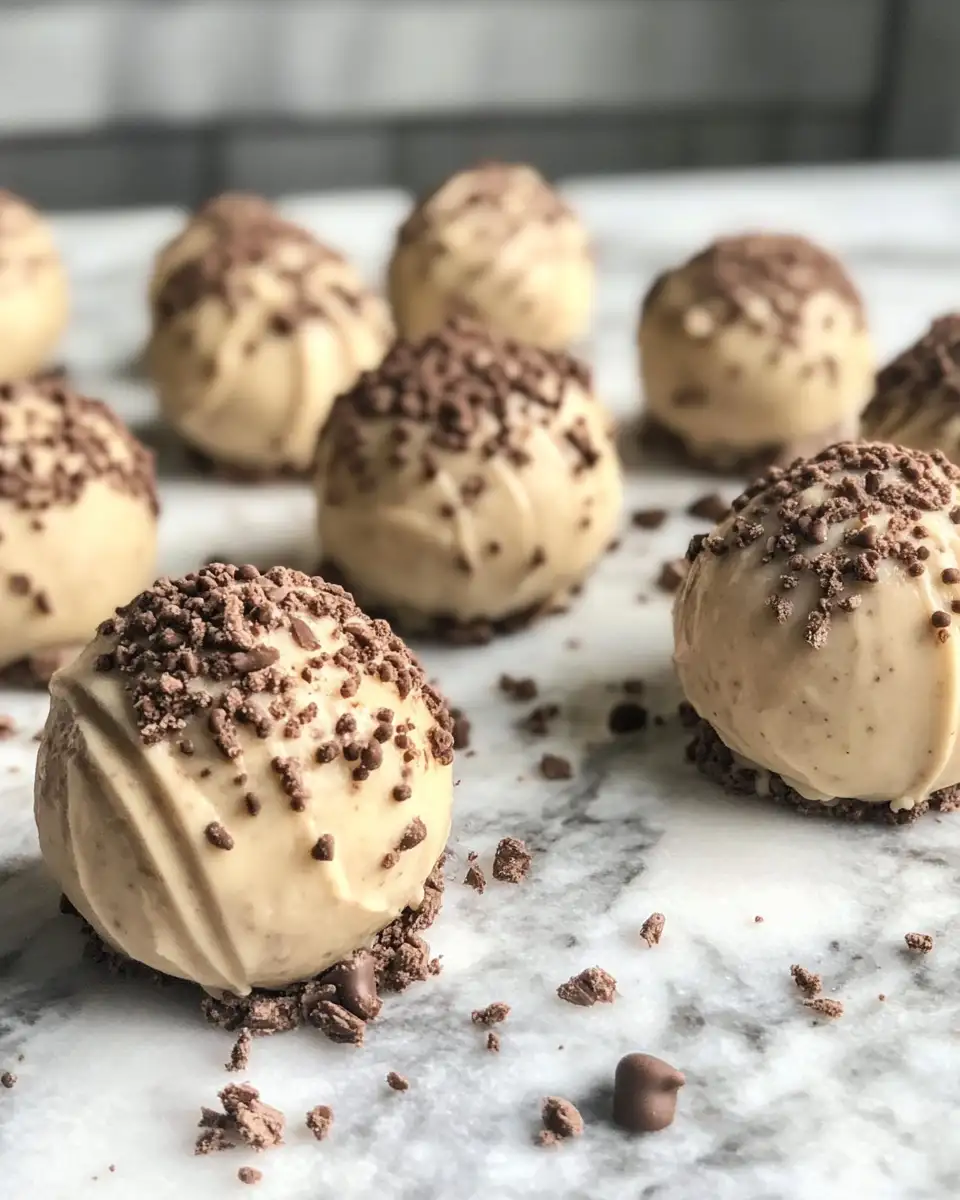
- Using a small cookie scoop or your hands, shape the mixture into 1-inch balls. This is where my husband often joins in, making it a fun family activity.
- Roll each ball in the crushed peanuts, ensuring they are evenly coated.
- Place the balls on a baking sheet lined with parchment paper and refrigerate for at least 1 hour to set.
These steps bring back memories of family bonding in the kitchen, where even the littlest hands can help roll and coat these yummy bites.
- Prep Time: 15 minutes
- Cook Time: 30 minutes
- Category: Main Dish
- Method: Cooking
- Cuisine: International
Steps to Create Your No-Bake Peanut Butter Cheesecake Balls
Let’s dive into the fun part—making these scrumptious treats. Remember, cooking is a journey, not just a destination, so enjoy each step!
- In a large mixing bowl, combine the peanut butter and softened cream cheese. Beat until smooth and creamy, about 2-3 minutes.
- Add in the graham cracker crumbs, powdered sugar, and vanilla extract. Mix until all ingredients are well incorporated.
- Gently fold in the mini chocolate chips if you’re using them. This step always puts a smile on my kids’ faces!
- Using a small cookie scoop or your hands, shape the mixture into 1-inch balls. This is where my husband often joins in, making it a fun family activity.
- Roll each ball in the crushed peanuts, ensuring they are evenly coated.
- Place the balls on a baking sheet lined with parchment paper and refrigerate for at least 1 hour to set.
These steps bring back memories of family bonding in the kitchen, where even the littlest hands can help roll and coat these yummy bites.
Tips for Making the Best No-Bake Peanut Butter Cheesecake Balls
Here are a few tips I’ve picked up over the years to ensure your cheesecake balls turn out perfect every time:
“Cooking is a language that speaks to the heart. Let every step be infused with love and a sprinkle of joy.”
Ensure the cream cheese is at room temperature to avoid lumps in your mixture. Don’t rush the chilling process—it’s what helps these balls hold their shape and enhances their flavor.
Serving Suggestions and Pairings
These cheesecake balls are incredibly versatile. They make a fantastic addition to any dessert platter or can be served solo with a cup of freshly brewed coffee. For an elegant touch, drizzle them with melted chocolate or pair them with fresh berries. In our home, they’re often a sweet conclusion to a family dinner, shared over stories and laughter.
Storage and Reheating Tips
While these treats rarely last long enough to worry about storage, they can be kept in an airtight container in the refrigerator for up to a week. If you plan to keep them longer, freeze them for up to a month. Simply thaw in the fridge before serving. Although they don’t require reheating, allowing them to sit at room temperature for a few minutes brings out their creamy texture.
Frequently Asked Questions
What are the main ingredients for No-Bake Peanut Butter Cheesecake Balls?
The main ingredients for No-Bake Peanut Butter Cheesecake Balls include the items listed in our ingredients section above. Each ingredient plays a crucial role in achieving the perfect flavor and texture.
How long does it take to make No-Bake Peanut Butter Cheesecake Balls?
The total time to make No-Bake Peanut Butter Cheesecake Balls includes both preparation and cooking time. Check the recipe card above for exact timing details.
Can I make No-Bake Peanut Butter Cheesecake Balls ahead of time?
Yes, No-Bake Peanut Butter Cheesecake Balls can often be prepared in advance. Store it properly in an airtight container in the refrigerator and consume within the recommended timeframe.
What can I serve with No-Bake Peanut Butter Cheesecake Balls?
No-Bake Peanut Butter Cheesecake Balls pairs well with various sides and accompaniments. Consider the serving suggestions mentioned in the recipe for the best dining experience.
Is No-Bake Peanut Butter Cheesecake Balls suitable for special diets?
Depending on the ingredients used, No-Bake Peanut Butter Cheesecake Balls may be adapted for various dietary needs. Check the ingredients list and consider substitutions as needed for your dietary requirements.
Final Thoughts
These No-Bake Peanut Butter Cheesecake Balls are more than just a treat—they’re a celebration of simplicity and flavor, a nod to the cherished moments spent in the kitchen. Whether you’re crafting these for a special occasion or to satisfy a sweet craving, may they bring as much joy to your table as they do to mine. Remember, every recipe is a story waiting to be told, one delicious bite at a time. So, grab a fork, pull up a chair, and let’s savor this journey together.