Irresistible Dry Rub Chicken Wings That Will Spice Up Your Snack Game
There’s something truly special about Dry Rub Chicken Wings that just pulls me right back into my family kitchen. They’re a favorite around our house—not just because they’re incredibly flavorful, but because they bring us all together. I still remember watching my grandmother sprinkle a handful of spices onto chicken, turning simple ingredients into pure magic. This recipe is my version of that tradition, infused with love and a bit of the chaos that comes with juggling work, family, and life. Whether you’re feeding a hungry crew after a busy day or looking for a crowd-pleasing snack for game night, these wings are an easy way to slow down, savor, and share a moment worth remembering.
Table of Contents
Why You’ll Love This Dry Rub Chicken Wings
One of the things I adore about Dry Rub Chicken Wings is how they capture that perfect balance between smoky, spicy, and just a touch of sweetness. They’re not drowned in sauce, so each bite lets the bold blend of spices shine through. I remember the first time I made these wings for my family after a hectic week. My kids were running around, my husband was glancing at the clock, but once we sat down with these wings, everything slowed. We laughed, talked, and for a few moments, the world felt a little lighter.
This recipe also stands out because it’s so approachable. As a mom, I know how precious time is, and these wings come together quickly without sacrificing any flavor. Plus, they’re versatile enough to customize with your favorite spices or heat level. I’ve found that making this recipe is like a little ritual—a chance to reconnect with the kitchen and with my loved ones, even on the busiest days.
Ingredients You’ll Need for This Dry Rub Chicken Wings
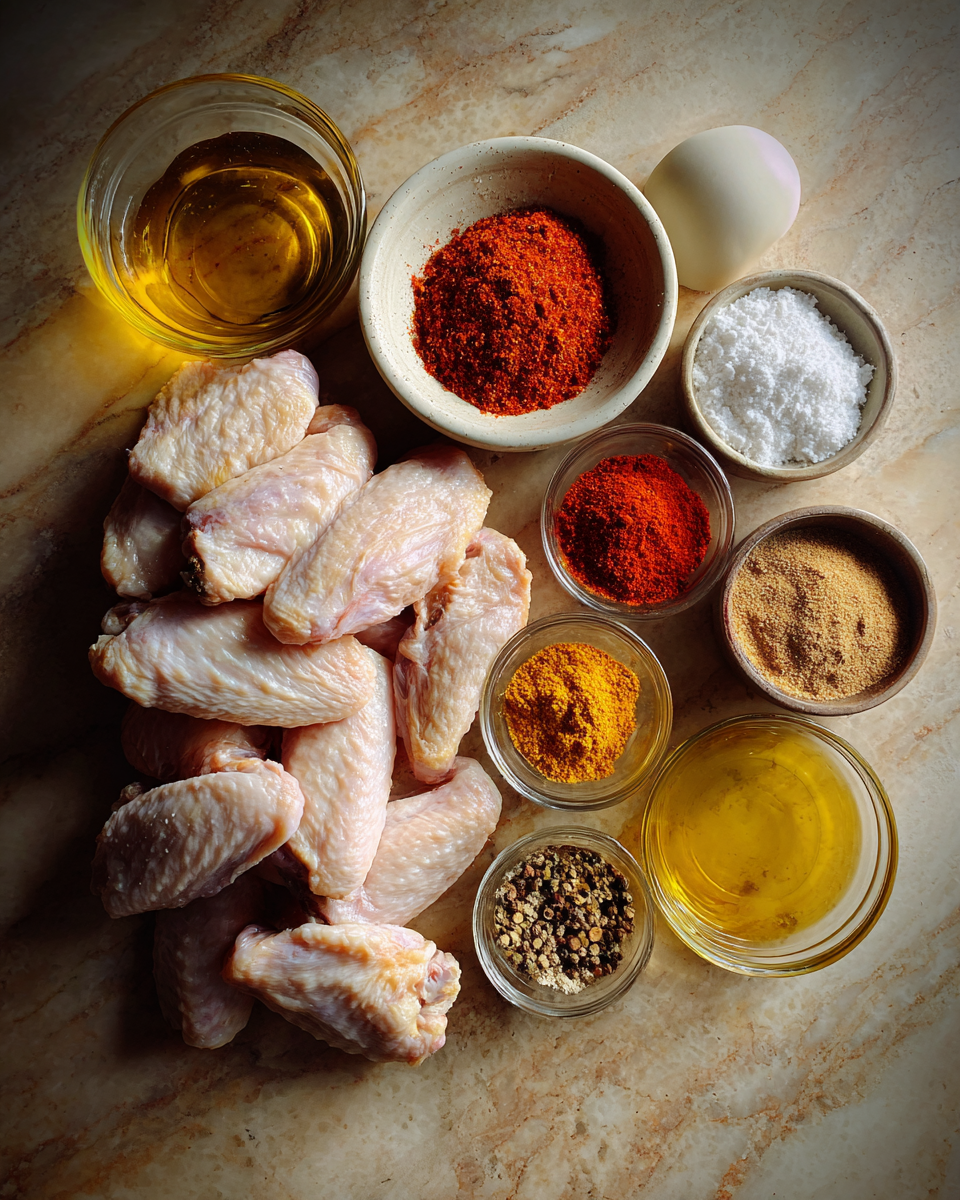
- 2 pounds chicken wings, separated into drumettes and flats
- 2 tablespoons olive oil
- 1 tablespoon smoked paprika (or regular paprika for milder flavor)
- 1 teaspoon garlic powder
- 1 teaspoon onion powder
- 1 teaspoon chili powder
- 1 teaspoon ground cumin
- 1/2 teaspoon cayenne pepper (adjust to taste)
- 1 teaspoon brown sugar (optional, for a touch of sweetness)
- 1 teaspoon kosher salt
- 1/2 teaspoon freshly ground black pepper
If you don’t have smoked paprika, regular paprika works well, or you can add a dash of liquid smoke for that smoky depth. For a less spicy option, simply reduce the cayenne pepper or leave it out entirely. And if you want to go gluten-free, rest assured this dry rub contains no flour or other gluten-containing ingredients.
Nutrition Facts
- Calories: Approximately 280 per serving (about 4 wings)
- Protein: 22g
- Fat: 18g
- Carbohydrates: 4g
- Fiber: 1g
- Sugar: 2g
- Sodium: 550mg
These numbers are based on using skin-on wings and olive oil. If you opt for skinless wings, the fat content will be lower, but keep in mind that some of the flavor comes from the skin’s crispy texture. I often remind myself that eating with my family, savoring each bite, and enjoying the moment is just as important as the nutrition facts.
Print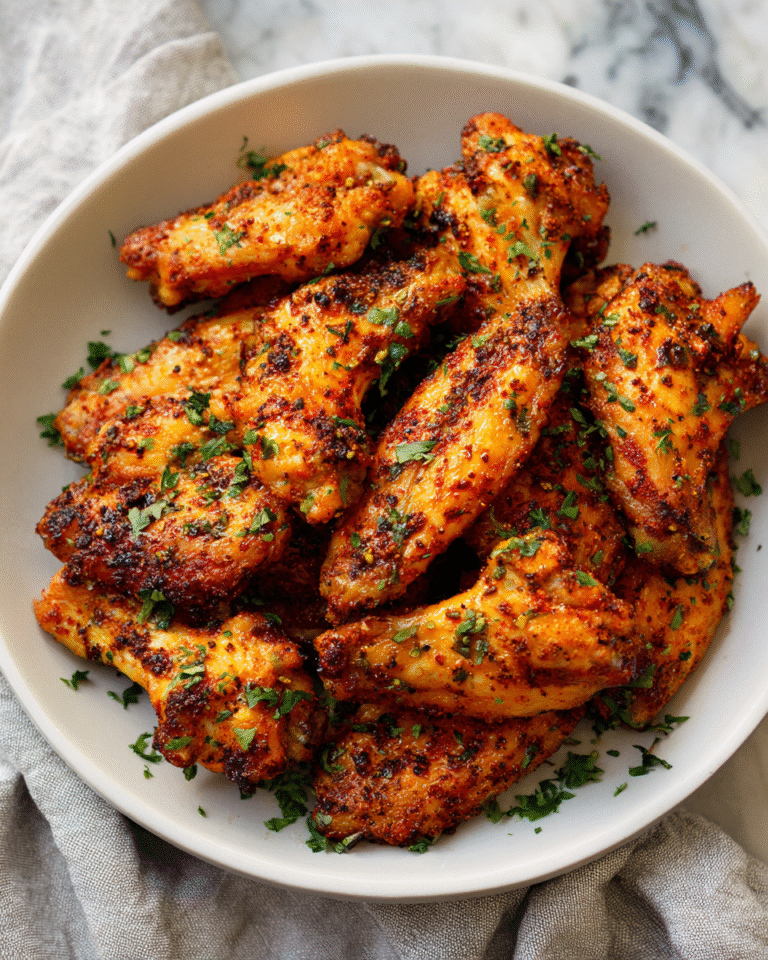
Irresistible Dry Rub Chicken Wings That Will Spice Up Your Snack Game
Learn how to make delicious Dry Rub Chicken Wings. Easy recipe with step-by-step instructions.
- Total Time: 45 minutes
- Yield: 4 servings 1x
Ingredients
- 2 pounds chicken wings, separated into drumettes and flats
- 2 tablespoons olive oil
- 1 tablespoon smoked paprika (or regular paprika for milder flavor)
- 1 teaspoon garlic powder
- 1 teaspoon onion powder
- 1 teaspoon chili powder
- 1 teaspoon ground cumin
- 1/2 teaspoon cayenne pepper (adjust to taste)
- 1 teaspoon brown sugar (optional, for a touch of sweetness)
- 1 teaspoon kosher salt
- 1/2 teaspoon freshly ground black pepper
If you don’t have smoked paprika, regular paprika works well, or you can add a dash of liquid smoke for that smoky depth. For a less spicy option, simply reduce the cayenne pepper or leave it out entirely. And if you want to go gluten-free, rest assured this dry rub contains no flour or other gluten-containing ingredients.
Instructions
- Preheat your oven to 425°F (220°C). Line a large baking sheet with foil and place a wire rack on top. This setup helps the heat circulate around the wings, keeping them crispy—something I learned early on from my grandmother’s insistence on crisp skin.
- Pat the chicken wings dry with paper towels. This step is key to getting that perfect crispiness after baking.
- In a large bowl, toss the wings with olive oil until evenly coated. This helps the dry rub stick and also crisps up the skin beautifully.
- In a small bowl, mix together smoked paprika, garlic powder, onion powder, chili powder, cumin, cayenne pepper, brown sugar, salt, and black pepper. I always take a moment here to breathe in the fragrant spices—it’s one of my favorite parts of cooking.
- Sprinkle the dry rub mixture over the wings and toss again until every wing is coated generously. Make sure to get into all the nooks and crannies; trust me, the flavor is worth it.
- Arrange the wings in a single layer on the wire rack. Avoid crowding them so they don’t steam and lose their crispness.
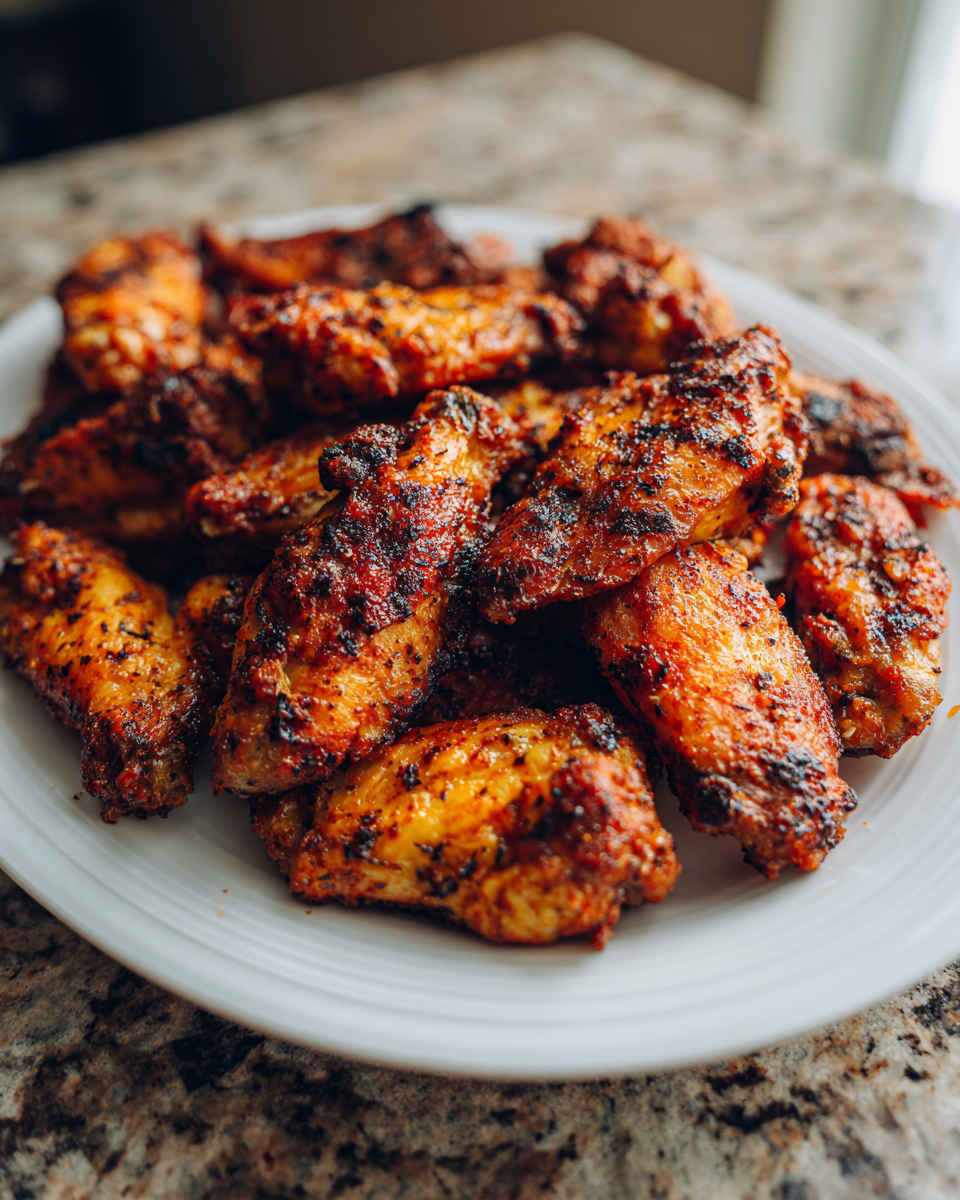
- Bake in the preheated oven for 40-45 minutes, flipping halfway through. You’re looking for a deep golden color and crispy edges—the telltale signs that these wings are ready to devour.
- Once done, remove from the oven and let them rest for 5 minutes. This little pause lets the juices redistribute, making each bite juicy and flavorful.
One of my personal tips is to keep the dry rub mixture handy for future batches. I often make a double batch of the rub and store it in a little jar—this way, a delicious wing night is always just a sprinkle away.
- Prep Time: 15 minutes
- Cook Time: 30 minutes
- Category: Main Dish
- Method: Cooking
- Cuisine: International
Steps to Create Your Dry Rub Chicken Wings
- Preheat your oven to 425°F (220°C). Line a large baking sheet with foil and place a wire rack on top. This setup helps the heat circulate around the wings, keeping them crispy—something I learned early on from my grandmother’s insistence on crisp skin.
- Pat the chicken wings dry with paper towels. This step is key to getting that perfect crispiness after baking.
- In a large bowl, toss the wings with olive oil until evenly coated. This helps the dry rub stick and also crisps up the skin beautifully.
- In a small bowl, mix together smoked paprika, garlic powder, onion powder, chili powder, cumin, cayenne pepper, brown sugar, salt, and black pepper. I always take a moment here to breathe in the fragrant spices—it’s one of my favorite parts of cooking.
- Sprinkle the dry rub mixture over the wings and toss again until every wing is coated generously. Make sure to get into all the nooks and crannies; trust me, the flavor is worth it.
- Arrange the wings in a single layer on the wire rack. Avoid crowding them so they don’t steam and lose their crispness.
- Bake in the preheated oven for 40-45 minutes, flipping halfway through. You’re looking for a deep golden color and crispy edges—the telltale signs that these wings are ready to devour.
- Once done, remove from the oven and let them rest for 5 minutes. This little pause lets the juices redistribute, making each bite juicy and flavorful.
One of my personal tips is to keep the dry rub mixture handy for future batches. I often make a double batch of the rub and store it in a little jar—this way, a delicious wing night is always just a sprinkle away.
Tips for Making the Best Dry Rub Chicken Wings
Having cooked countless wings for my family and friends, I’ve learned a few things that really elevate this recipe: Learn more: Irresistible Crab Crunchies: A Seafood Snack You Can’t Resist
- Dry the wings thoroughly: Moisture is the enemy of crispiness. Patting them dry before applying oil and rub makes all the difference.
- Use a wire rack: This allows air to circulate and the fat to drip away, resulting in wings that are crispy all over.
- Adjust spice levels: I love a little heat, but for kids or milder palates, reduce or omit the cayenne pepper. You can even add a pinch of cinnamon or nutmeg for a subtle warmth.
- Make ahead: You can prep the wings with the dry rub the night before and refrigerate them overnight. This really deepens the flavors and saves you time on busy evenings.
- Don’t forget to flip: Turning the wings halfway through baking ensures even cooking and browning.
Cooking is my way of connecting with my family, and these little tips come from years of trial, error, and moments shared around the dinner table. Sometimes the simplest changes make the biggest impact.
Serving Suggestions and Pairings
Dry Rub Chicken Wings are a star on their own, but I love pairing them with sides that balance their boldness. In our home, a crisp salad with tangy vinaigrette or some classic coleslaw brings a refreshing crunch. A creamy dip—ranch or blue cheese—is always a hit with the kids, even if they act like they don’t need it.
For heartier meals, I often serve these wings alongside roasted sweet potatoes or garlic mashed potatoes. On casual nights, some warm crusty bread or cornbread helps soak up any lingering spice and makes the meal feel cozy and complete.
And of course, no wing night is complete without a cold drink—whether that’s a sparkling lemonade for the kids or a chilled craft beer for the adults. These pairings turn the meal into a celebration, just like the Sunday roasts and family dinners that first inspired me to start RecipeChic.
Storage and Reheating Tips
Sometimes, life gets hectic, and you might have leftovers—thankfully, Dry Rub Chicken Wings hold up well in the fridge. Here’s how I keep them tasting fresh:
- Store leftover wings in an airtight container in the refrigerator for up to 3 days.
- To reheat, place wings on a baking sheet and warm in a 375°F (190°C) oven for 10-15 minutes, flipping halfway through. This helps them regain their crispiness without drying out.
- If you’re in a hurry, a quick reheat in a skillet over medium heat with a splash of oil can also crisp them up nicely.
- Avoid microwaving if you can—it tends to make the skin soggy and chewy, which is the last thing you want after all that effort!
In my busy household, these storage tips have saved many a rushed dinner. I’ve learned that a little prep and smart reheating can turn leftovers into just-as-good second helpings.
Frequently Asked Questions
What are the main ingredients for Dry Rub Chicken Wings?
The main ingredients for Dry Rub Chicken Wings include the items listed in our ingredients section above. Each ingredient plays a crucial role in achieving the perfect flavor and texture.
How long does it take to make Dry Rub Chicken Wings?
The total time to make Dry Rub Chicken Wings includes both preparation and cooking time. Check the recipe card above for exact timing details.
Can I make Dry Rub Chicken Wings ahead of time?
Yes, Dry Rub Chicken Wings can often be prepared in advance. Store it properly in an airtight container in the refrigerator and consume within the recommended timeframe.
What can I serve with Dry Rub Chicken Wings?
Dry Rub Chicken Wings pairs well with various sides and accompaniments. Consider the serving suggestions mentioned in the recipe for the best dining experience.
Is Dry Rub Chicken Wings suitable for special diets?
Depending on the ingredients used, Dry Rub Chicken Wings may be adapted for various dietary needs. Check the ingredients list and consider substitutions as needed for your dietary requirements.
Final Thoughts
Dry Rub Chicken Wings are more than just a recipe in my kitchen—they’re a bridge between generations, a way to bring people together, and a reminder that even in the busiest moments, we can find joy and connection around food. From standing on that stool in my grandmother’s kitchen to now sharing these flavors with my own family, cooking has always been about love, stories, and memories.
So whether you’re a seasoned cook or just starting out, I hope this recipe inspires you to slow down, savor the process, and create your own moments worth sharing. Because here at RecipeChic, food isn’t just about eating—it’s about living, loving, and telling your story one delicious bite at a time.