Crunch Into Flavor with Crispy Chicken Caesar Tortilla Wraps
There’s something truly comforting about a meal that feels both indulgent and fresh, especially when it can come together quickly on a busy weeknight. That’s exactly why Crispy Chicken Caesar Tortilla Wraps have become a favorite in our house. They combine that satisfying crunch of golden chicken with the creamy, tangy goodness of Caesar dressing—wrapped up neatly in a soft tortilla. It’s the kind of meal that brings my family to the table with smiles, even after a hectic day of work, school runs, and everything in between.
Cooking has always been my way to pause the chaos and connect with my loved ones. I still remember standing on a stool in my grandmother’s kitchen, watching her sprinkle just the right amount of seasoning into her recipes, turning simple ingredients into magic. These wraps remind me of those moments—a perfect blend of comfort and ease, made with care and shared with love.
Table of Contents
Why You’ll Love This Crispy Chicken Caesar Tortilla Wraps
If you’re anything like me—a mom juggling a million things at once—you’ll appreciate how these wraps strike the perfect balance between hearty and quick. The crispy chicken adds a satisfyingly crunchy texture that kids and adults alike rave about. Pair that with fresh romaine, parmesan cheese, and a drizzle of Caesar dressing, and you’ve got a wrap that feels like a little celebration, even on the simplest nights.
What I love most is how adaptable this recipe is. Whether you’re making a casual lunch or a light dinner, these wraps come together in under 30 minutes, which is a win in my book. And because food is the thread that ties my family together, these wraps have become our go-to for cozy evenings when we want something delicious without the fuss.
Plus, wrapping everything in a soft tortilla makes it portable and perfect for busy days, picnics, or even a quick meal on the go. The blend of textures and flavors is a reminder that good food doesn’t have to be complicated—it just needs a little love.
Ingredients You’ll Need for This Crispy Chicken Caesar Tortilla Wraps
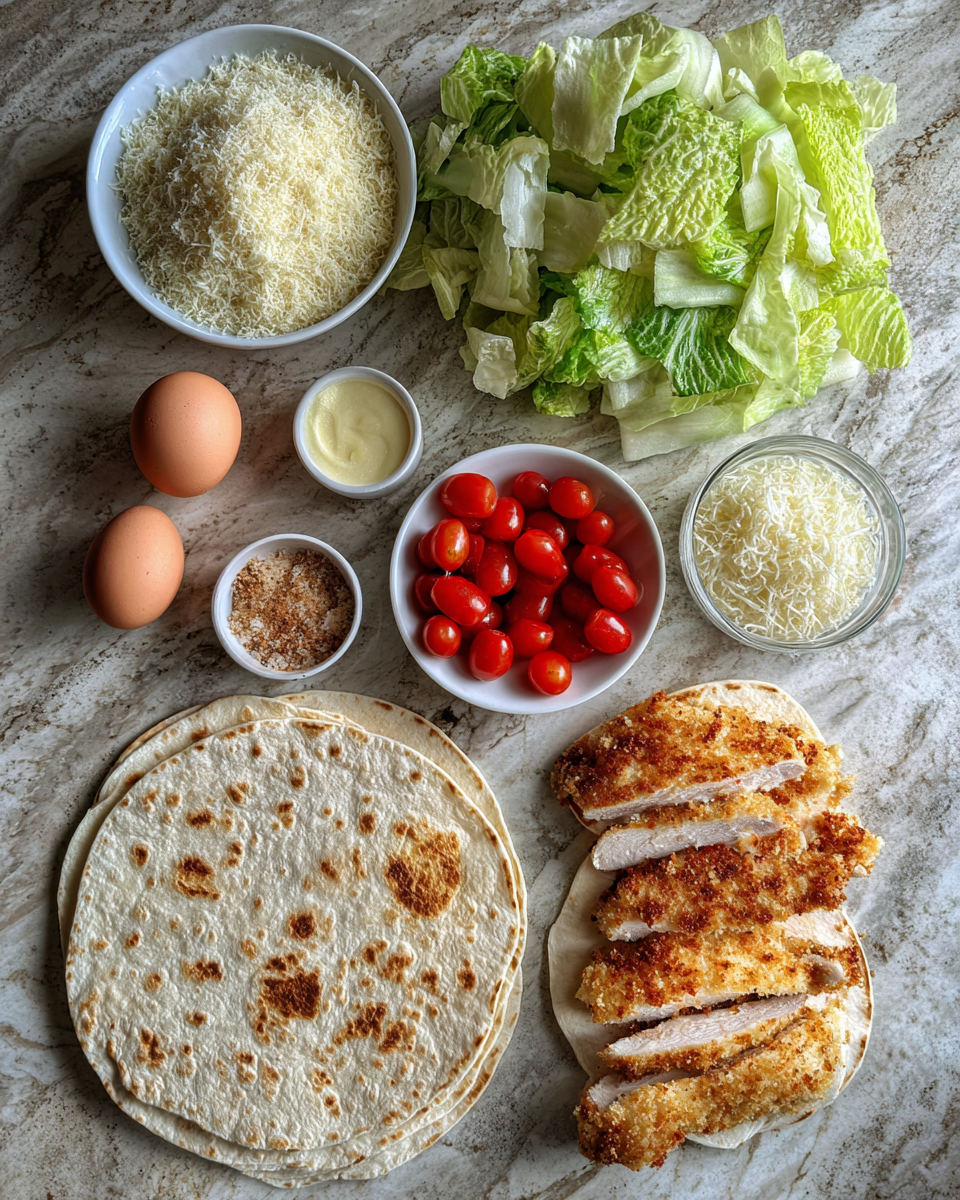
- 2 large boneless, skinless chicken breasts (about 1 pound)
- 1 cup panko breadcrumbs (for extra crunch, you can substitute with crushed cornflakes)
- 1/2 cup grated Parmesan cheese, divided
- 1 teaspoon garlic powder
- 1 teaspoon paprika
- Salt and freshly ground black pepper, to taste
- 2 large eggs
- 4 large flour tortillas (10-inch size works best; whole wheat can be used for a healthier option)
- 2 cups chopped romaine lettuce
- 1/2 cup Caesar dressing (store-bought or homemade, depending on how much time you have)
- Optional: Cherry tomatoes, halved, for a fresh pop of color and flavor
- Olive oil or vegetable oil, for frying
When I first shared this recipe with my family, I started with store-bought Caesar dressing to keep it simple. But over time, I’ve learned that a quick homemade dressing (a mix of mayo, lemon juice, anchovy paste, and a little garlic) elevates the flavor without adding too much prep time. Feel free to adjust based on your pantry and preferences!
Nutrition Facts
- Calories: Approximately 450 per serving
- Protein: 35g
- Fat: 18g (mostly from the cheese and dressing)
- Carbohydrates: 35g
- Fiber: 3g
- Sugar: 4g
- Sodium: 700mg (can be reduced by using low-sodium dressing and seasoning)
I like to keep an eye on nutrition, especially when feeding my family day in and day out. These wraps offer a great balance of protein and carbs to keep you energized. If you want to lighten them up, swapping out the tortilla for a low-carb or whole grain version, or using a lighter dressing, can make a difference without sacrificing flavor. Learn more: Sizzling Hot Orange Chicken: A Flavor Explosion on Your Plate
Print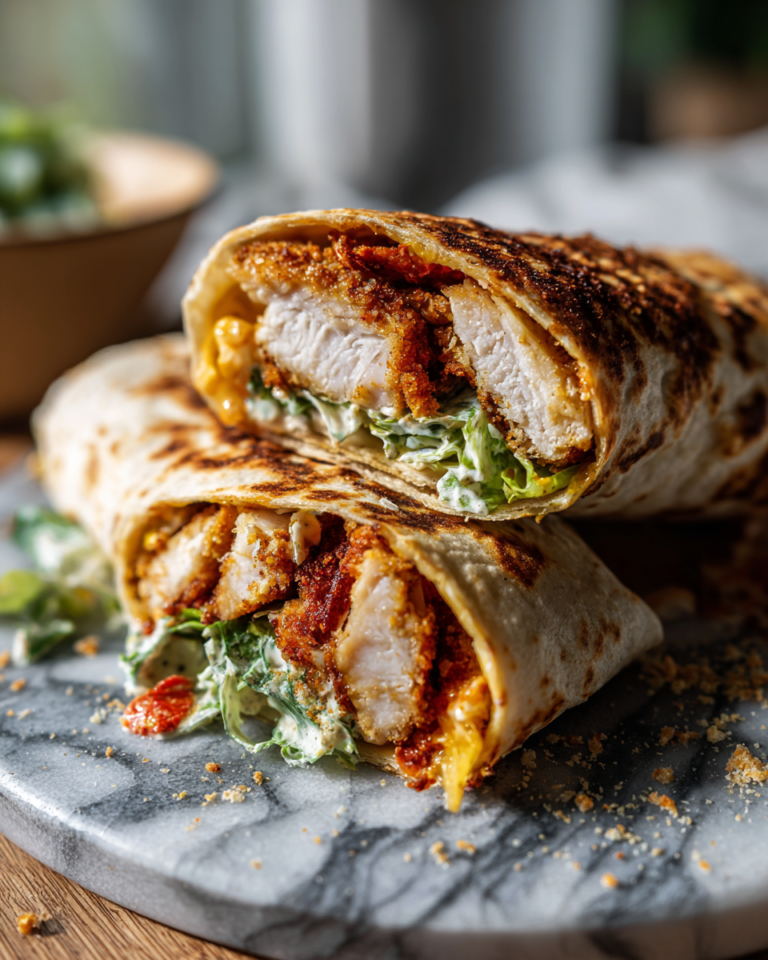
Crunch Into Flavor with Crispy Chicken Caesar Tortilla Wraps
Learn how to make delicious Crispy Chicken Caesar Tortilla Wraps. Easy recipe with step-by-step instructions.
- Total Time: 45 minutes
- Yield: 4 servings 1x
Ingredients
- 2 large boneless, skinless chicken breasts (about 1 pound)
- 1 cup panko breadcrumbs (for extra crunch, you can substitute with crushed cornflakes)
- 1/2 cup grated Parmesan cheese, divided
- 1 teaspoon garlic powder
- 1 teaspoon paprika
- Salt and freshly ground black pepper, to taste
- 2 large eggs
- 4 large flour tortillas (10-inch size works best; whole wheat can be used for a healthier option)
- 2 cups chopped romaine lettuce
- 1/2 cup Caesar dressing (store-bought or homemade, depending on how much time you have)
- Optional: Cherry tomatoes, halved, for a fresh pop of color and flavor
- Olive oil or vegetable oil, for frying
When I first shared this recipe with my family, I started with store-bought Caesar dressing to keep it simple. But over time, I’ve learned that a quick homemade dressing (a mix of mayo, lemon juice, anchovy paste, and a little garlic) elevates the flavor without adding too much prep time. Feel free to adjust based on your pantry and preferences!
Instructions
- Start by slicing the chicken breasts into thin, even strips. This ensures they cook quickly and evenly—a trick I picked up from my grandmother, who always said, “Even cooking means happy eating.”
- In a shallow bowl, combine the panko breadcrumbs, half of the grated Parmesan, garlic powder, paprika, salt, and pepper. Mix well.
- In another bowl, beat the eggs until smooth. This will be your coating base for the chicken strips.
- Dip each chicken strip into the beaten eggs, then dredge it thoroughly in the breadcrumb mixture, pressing gently to adhere the coating.
- Heat about 1/4 cup of oil in a large skillet over medium heat. Once hot (test by dropping a small breadcrumb—if it sizzles, you’re good), fry the chicken strips in batches. Cook each side for about 3-4 minutes until golden brown and cooked through. The smell when they start to crisp up is pure magic—trust me, it’ll have your family hovering around the kitchen!
- Remove the chicken and let it drain briefly on paper towels to keep it crispy.
- Warm the tortillas in a dry skillet or microwave to make them more pliable for wrapping.
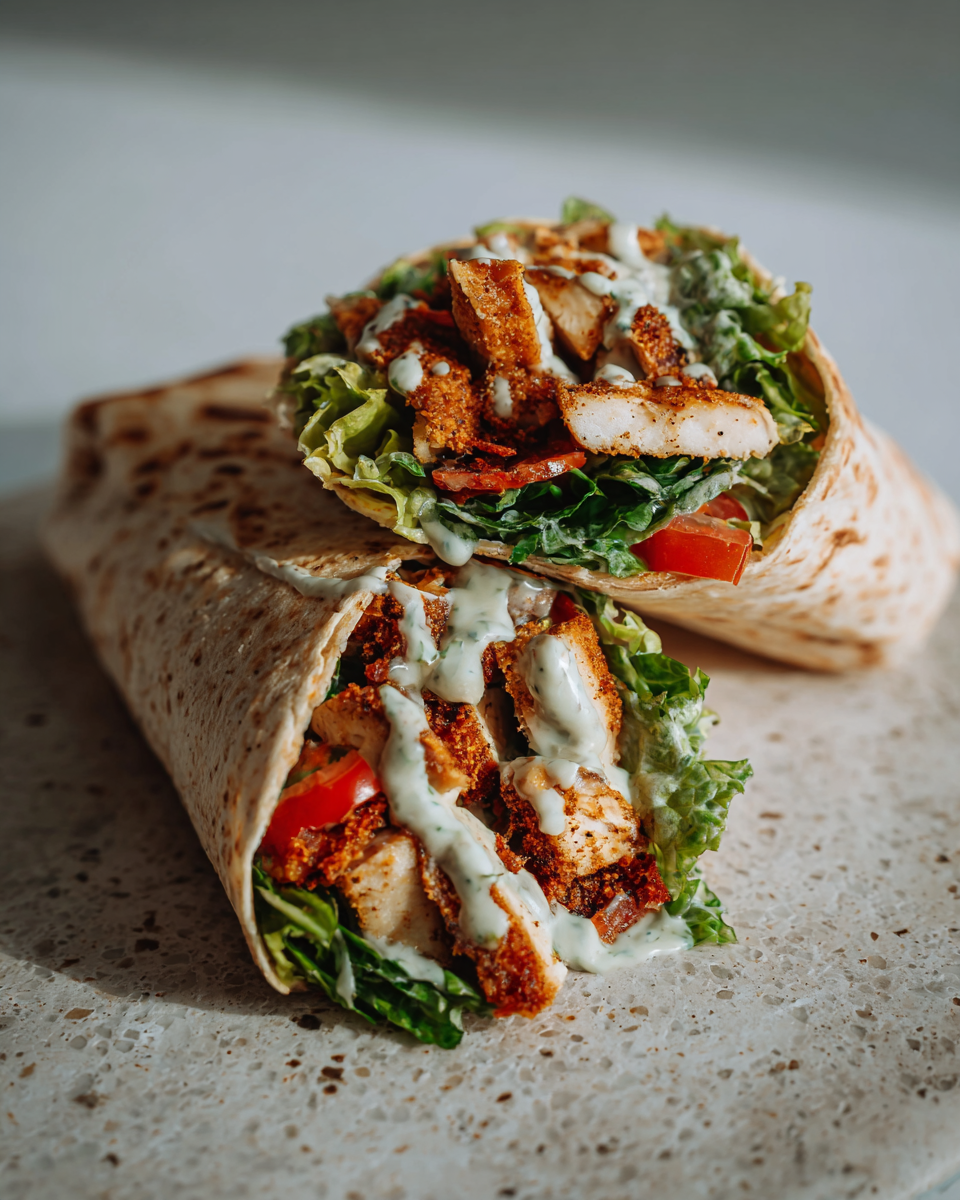
- To assemble, spread a spoonful of Caesar dressing down the center of each tortilla. Layer with chopped romaine lettuce, a few pieces of the crispy chicken, a sprinkle of the remaining Parmesan, and cherry tomatoes if using.
- Fold in the sides of the tortilla and roll tightly to enclose the filling. If you want, you can secure with a toothpick for easier eating.
- Serve immediately for the best crunch and flavor. If you want a warm wrap, pop it into a skillet for a minute or two on each side, just like a quesadilla.
One of my favorite kitchen memories is the sound of my kids’ laughter as they eagerly bite into these wraps, crunching through the chicken and savoring the creamy Caesar. It’s moments like those that remind me why cooking, even with a busy schedule, is always worth it.
- Prep Time: 15 minutes
- Cook Time: 30 minutes
- Category: Main Dish
- Method: Cooking
- Cuisine: International
Steps to Create Your Crispy Chicken Caesar Tortilla Wraps
- Start by slicing the chicken breasts into thin, even strips. This ensures they cook quickly and evenly—a trick I picked up from my grandmother, who always said, “Even cooking means happy eating.”
- In a shallow bowl, combine the panko breadcrumbs, half of the grated Parmesan, garlic powder, paprika, salt, and pepper. Mix well.
- In another bowl, beat the eggs until smooth. This will be your coating base for the chicken strips.
- Dip each chicken strip into the beaten eggs, then dredge it thoroughly in the breadcrumb mixture, pressing gently to adhere the coating.
- Heat about 1/4 cup of oil in a large skillet over medium heat. Once hot (test by dropping a small breadcrumb—if it sizzles, you’re good), fry the chicken strips in batches. Cook each side for about 3-4 minutes until golden brown and cooked through. The smell when they start to crisp up is pure magic—trust me, it’ll have your family hovering around the kitchen!
- Remove the chicken and let it drain briefly on paper towels to keep it crispy.
- Warm the tortillas in a dry skillet or microwave to make them more pliable for wrapping.
- To assemble, spread a spoonful of Caesar dressing down the center of each tortilla. Layer with chopped romaine lettuce, a few pieces of the crispy chicken, a sprinkle of the remaining Parmesan, and cherry tomatoes if using.
- Fold in the sides of the tortilla and roll tightly to enclose the filling. If you want, you can secure with a toothpick for easier eating.
- Serve immediately for the best crunch and flavor. If you want a warm wrap, pop it into a skillet for a minute or two on each side, just like a quesadilla.
One of my favorite kitchen memories is the sound of my kids’ laughter as they eagerly bite into these wraps, crunching through the chicken and savoring the creamy Caesar. It’s moments like those that remind me why cooking, even with a busy schedule, is always worth it.
Tips for Making the Best Crispy Chicken Caesar Tortilla Wraps
- Use panko breadcrumbs for an extra crunchy texture—regular breadcrumbs just don’t give the same satisfying crisp.
- Don’t overcrowd your skillet when frying the chicken. Give each piece space so it browns nicely instead of steaming.
- For a healthier twist, bake the breaded chicken strips at 400°F for 15-20 minutes, flipping halfway, until golden and cooked through.
- Homemade Caesar dressing can be whipped up in just 5 minutes and tastes fresh and vibrant. If anchovies aren’t your thing, try substituting with a bit of Worcestershire sauce.
- Warm your tortillas before assembling to prevent cracking and make wrapping easier—this little step makes a big difference.
- If you’re in a real rush, rotisserie chicken can be chopped and used instead of frying your own. Just toss with a little extra Caesar dressing for flavor.
My cooking philosophy has always been about making food approachable and full of love. These tips come from years of learning how to keep meals delicious without adding extra stress, so you can enjoy more time around the table.
Serving Suggestions and Pairings
These Crispy Chicken Caesar Tortilla Wraps are versatile enough to stand on their own but also pair wonderfully with a few simple sides. In our home, I like to serve them alongside:
- A crisp garden salad with lemon vinaigrette to add a bright, refreshing contrast
- Crispy sweet potato fries or baked potato wedges for a family-friendly comfort side
- A light cup of tomato soup when the weather turns chilly—it’s like a cozy hug in a meal
- For a little extra indulgence, a side of garlic parmesan roasted broccoli or green beans
When I’m hosting friends or family, I sometimes set out a wrap bar with extra Caesar dressing, sliced avocados, and even a few crunchy pickles. It turns dinner into a fun, interactive experience—something kids especially love.
Storage and Reheating Tips
As a mom, I know how valuable leftovers can be. These wraps keep well if stored properly:
- Wrap each tortilla tightly in plastic wrap or foil, then place in an airtight container in the refrigerator.
- Consume within 2 days for the best texture and flavor.
- To reheat, unwrap and warm the chicken strips separately in a skillet or oven to maintain their crispiness, then reassemble the wrap with fresh lettuce and dressing.
- Avoid microwaving the entire wrap as the tortilla can become soggy and the chicken loses its crunch.
Sometimes, I prepare the chicken ahead of time and store it separately from the greens and tortillas. This way, dinner feels just as fresh, and I can still enjoy those precious moments when everyone gathers around the table.
Frequently Asked Questions
What are the main ingredients for Crispy Chicken Caesar Tortilla Wraps?
The main ingredients for Crispy Chicken Caesar Tortilla Wraps include the items listed in our ingredients section above. Each ingredient plays a crucial role in achieving the perfect flavor and texture.
How long does it take to make Crispy Chicken Caesar Tortilla Wraps?
The total time to make Crispy Chicken Caesar Tortilla Wraps includes both preparation and cooking time. Check the recipe card above for exact timing details.
Can I make Crispy Chicken Caesar Tortilla Wraps ahead of time?
Yes, Crispy Chicken Caesar Tortilla Wraps can often be prepared in advance. Store it properly in an airtight container in the refrigerator and consume within the recommended timeframe.
What can I serve with Crispy Chicken Caesar Tortilla Wraps?
Crispy Chicken Caesar Tortilla Wraps pairs well with various sides and accompaniments. Consider the serving suggestions mentioned in the recipe for the best dining experience.
Is Crispy Chicken Caesar Tortilla Wraps suitable for special diets?
Depending on the ingredients used, Crispy Chicken Caesar Tortilla Wraps may be adapted for various dietary needs. Check the ingredients list and consider substitutions as needed for your dietary requirements.
Final Thoughts
Crispy Chicken Caesar Tortilla Wraps are more than just a recipe to me—they’re a delicious reminder of what food truly means in our home. It’s the laughter around the table, the small moments of connection, and the comforting routine that turns ordinary days into cherished memories.
I hope this recipe brings that same warmth to your kitchen. Whether you’re a busy parent, a food lover, or someone who simply enjoys a good wrap, these Crispy Chicken Caesar Tortilla Wraps are designed to make your mealtime a little easier and a lot tastier. So grab your skillet, call your family to the table, and savor the crunch, the creaminess, and the love that goes into every bite.
After all, here at RecipeChic, it’s not just about eating—it’s about living, loving, and sharing stories through every delicious mouthful.