Crispy Fried Pickle Chicken Sandwich Sliders You Need to Try Now
There are few things in this world that bring my family together quite like a plate of Fried Pickle Chicken Sandwich Sliders. These little bites of crispy, tangy, and juicy goodness have become a weekend staple in our home. I still remember the first time I made them—standing on a stool in my grandmother’s kitchen, trying to perfect the batter, while my kids eagerly hovered nearby, ready to devour whatever came out of the fryer. These sliders aren’t just about satisfying hunger; they’re about creating moments that make mealtimes feel special, even on the busiest of days.
Table of Contents
Why You’ll Love This Fried Pickle Chicken Sandwich Sliders
What’s not to love about Fried Pickle Chicken Sandwich Sliders? They bring together that unbeatable combo of crunchy fried chicken and tangy pickles, all nestled inside soft, buttery slider buns. These sliders are the perfect way to turn a simple meal into a celebration of flavors and textures. As a mom juggling work, school runs, and all the chaos in between, I appreciate how these sliders come together quickly but still feel indulgent enough for a family treat.
One of the reasons I love sharing this recipe is because it’s approachable for cooks of all skill levels. You don’t need fancy ingredients or complicated techniques—just good, honest food that tastes amazing. Plus, these sliders are a hit with kids and adults alike, making them great for family dinners, casual get-togethers, or even game day snacks. Every time I make these, I’m reminded of how food can be the thread that ties us together, turning ordinary evenings into warm, memorable moments.
Ingredients You’ll Need for This Fried Pickle Chicken Sandwich Sliders
- 1 pound boneless, skinless chicken breasts, cut into slider-sized pieces
- 1 cup dill pickle slices, drained
- 1 cup buttermilk
- 1 teaspoon garlic powder
- 1 teaspoon smoked paprika
- 1/2 teaspoon cayenne pepper (optional, for a little kick)
- 1 teaspoon salt
- 1/2 teaspoon black pepper
- 1 1/2 cups all-purpose flour
- 1 teaspoon baking powder
- Vegetable oil, for frying (about 4 cups)
- 8 slider buns, split and lightly toasted
- Mayonnaise or your favorite sandwich sauce
- Fresh lettuce leaves (optional)
Substitution suggestions: If you don’t have buttermilk on hand, you can make a quick substitute by mixing 1 cup of milk with 1 tablespoon of lemon juice or white vinegar and letting it sit for 5 minutes. For a gluten-free version, swap the all-purpose flour for a gluten-free blend and ensure your baking powder is gluten-free as well.
Nutrition Facts
- Calories: Approximately 450 per serving (2 sliders)
- Protein: 28g
- Fat: 18g
- Carbohydrates: 40g
- Fiber: 2g
- Sugar: 5g
- Sodium: 700mg
These numbers can vary slightly depending on the brand of ingredients you use and the size of your sliders. I always encourage balancing indulgent meals like this with fresh veggies or a light side salad to keep things wholesome and satisfying.
Print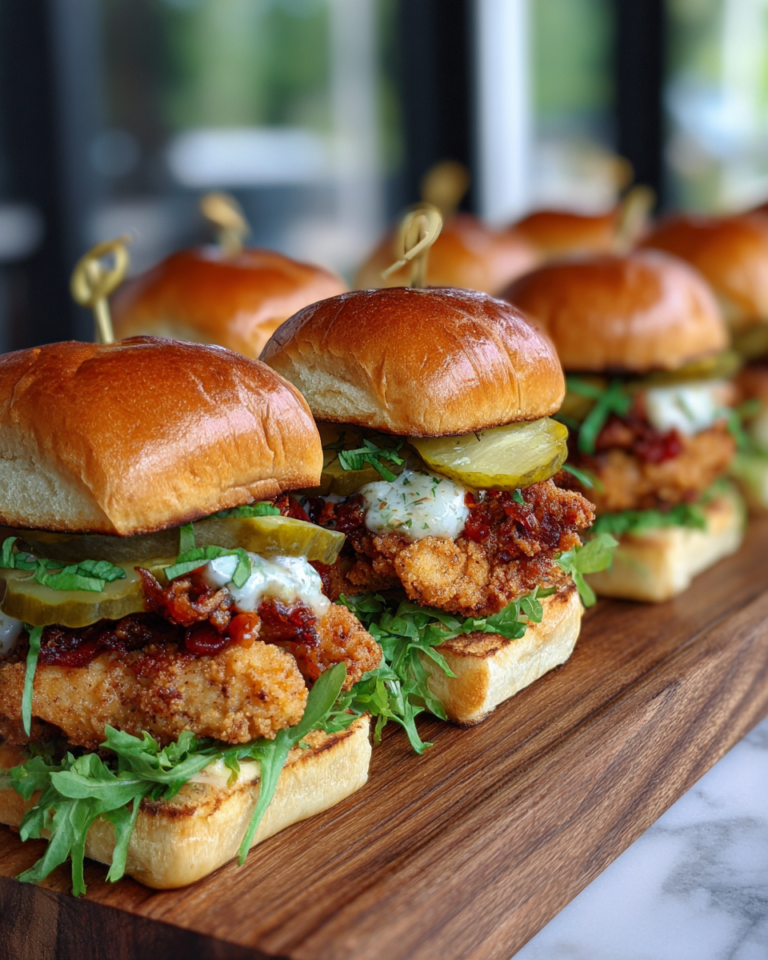
Crispy Fried Pickle Chicken Sandwich Sliders You Need to Try Now
Learn how to make delicious Fried Pickle Chicken Sandwich Sliders. Easy recipe with step-by-step instructions.
- Total Time: 45 minutes
- Yield: 4 servings 1x
Ingredients
- 1 pound boneless, skinless chicken breasts, cut into slider-sized pieces
- 1 cup dill pickle slices, drained
- 1 cup buttermilk
- 1 teaspoon garlic powder
- 1 teaspoon smoked paprika
- 1/2 teaspoon cayenne pepper (optional, for a little kick)
- 1 teaspoon salt
- 1/2 teaspoon black pepper
- 1 1/2 cups all-purpose flour
- 1 teaspoon baking powder
- Vegetable oil, for frying (about 4 cups)
- 8 slider buns, split and lightly toasted
- Mayonnaise or your favorite sandwich sauce
- Fresh lettuce leaves (optional)
Substitution suggestions: If you don’t have buttermilk on hand, you can make a quick substitute by mixing 1 cup of milk with 1 tablespoon of lemon juice or white vinegar and letting it sit for 5 minutes. For a gluten-free version, swap the all-purpose flour for a gluten-free blend and ensure your baking powder is gluten-free as well.
Instructions
- Start by marinating the chicken pieces in buttermilk mixed with garlic powder, smoked paprika, cayenne pepper, salt, and black pepper. Cover and refrigerate for at least 30 minutes, or up to 4 hours. This step is key—it not only tenderizes the chicken but also infuses it with flavor.
- While the chicken marinates, prepare your frying station. Heat vegetable oil in a deep skillet or Dutch oven to 350°F (175°C). Use a thermometer to maintain the temperature for crispy, golden results.
- In a shallow bowl, whisk together the flour and baking powder. This combination helps create a light, crispy coating that I still remember my grandmother raving about.
- Remove the chicken pieces from the buttermilk marinade, letting any excess drip off. Dredge each piece thoroughly in the flour mixture, pressing gently to adhere. For extra crunch, you can double-dip by returning the chicken to the buttermilk briefly, then back into the flour.
- Carefully lower the coated chicken pieces into the hot oil, frying in batches to avoid overcrowding. Fry for about 4-5 minutes, turning occasionally, until golden brown and cooked through (internal temperature should reach 165°F/74°C).
- Transfer fried chicken to a wire rack set over a baking sheet to drain excess oil while you finish frying the remaining pieces.
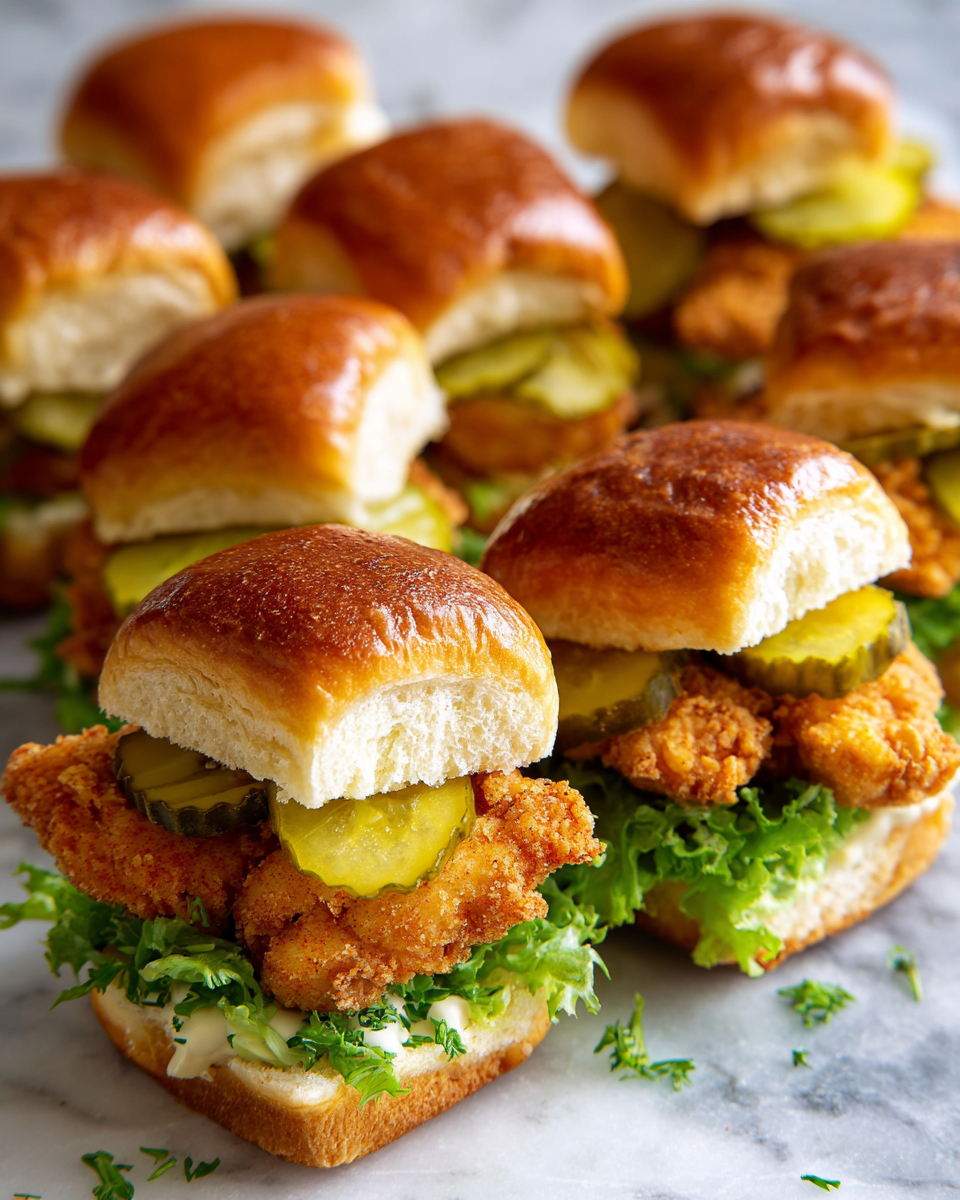
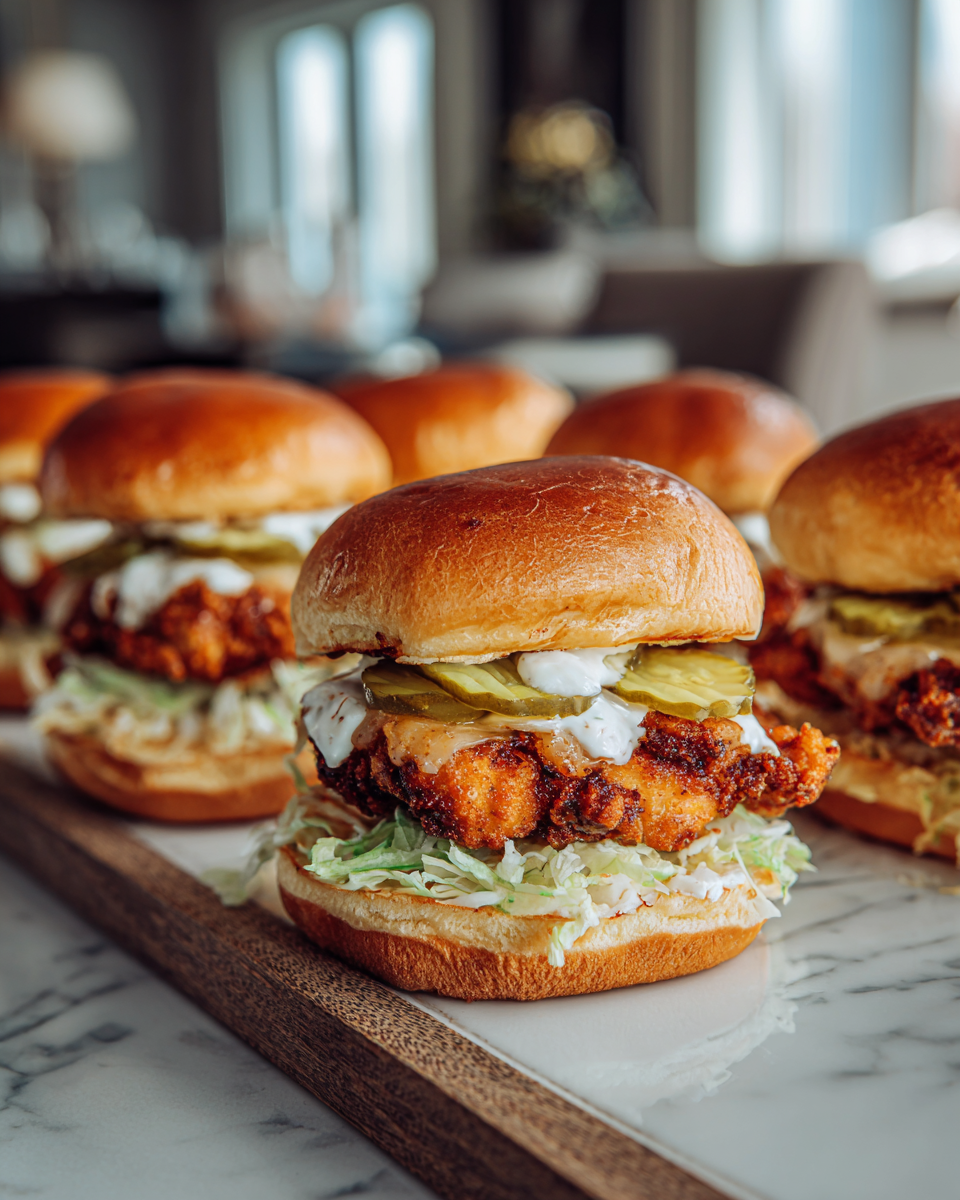
- To assemble, spread mayonnaise or your preferred sauce on the bottom half of each toasted slider bun. Layer on a piece of fried chicken, top with a couple of dill pickle slices, and add fresh lettuce if you like that extra crunch.
- Top with the bun crown and press gently. Serve immediately for the best texture and flavor.
Quick tip from my kitchen: keeping the fried chicken warm in a low oven (around 200°F) while you finish frying makes assembling the sliders much easier and ensures everyone gets hot, crispy bites.
- Prep Time: 15 minutes
- Cook Time: 30 minutes
- Category: Main Dish
- Method: Cooking
- Cuisine: International
Steps to Create Your Fried Pickle Chicken Sandwich Sliders
- Start by marinating the chicken pieces in buttermilk mixed with garlic powder, smoked paprika, cayenne pepper, salt, and black pepper. Cover and refrigerate for at least 30 minutes, or up to 4 hours. This step is key—it not only tenderizes the chicken but also infuses it with flavor.
- While the chicken marinates, prepare your frying station. Heat vegetable oil in a deep skillet or Dutch oven to 350°F (175°C). Use a thermometer to maintain the temperature for crispy, golden results.
- In a shallow bowl, whisk together the flour and baking powder. This combination helps create a light, crispy coating that I still remember my grandmother raving about.
- Remove the chicken pieces from the buttermilk marinade, letting any excess drip off. Dredge each piece thoroughly in the flour mixture, pressing gently to adhere. For extra crunch, you can double-dip by returning the chicken to the buttermilk briefly, then back into the flour.
- Carefully lower the coated chicken pieces into the hot oil, frying in batches to avoid overcrowding. Fry for about 4-5 minutes, turning occasionally, until golden brown and cooked through (internal temperature should reach 165°F/74°C).
- Transfer fried chicken to a wire rack set over a baking sheet to drain excess oil while you finish frying the remaining pieces.
- To assemble, spread mayonnaise or your preferred sauce on the bottom half of each toasted slider bun. Layer on a piece of fried chicken, top with a couple of dill pickle slices, and add fresh lettuce if you like that extra crunch.
- Top with the bun crown and press gently. Serve immediately for the best texture and flavor.
Quick tip from my kitchen: keeping the fried chicken warm in a low oven (around 200°F) while you finish frying makes assembling the sliders much easier and ensures everyone gets hot, crispy bites.
Tips for Making the Best Fried Pickle Chicken Sandwich Sliders
Over the years, I’ve learned a few tricks that take these sliders from good to unforgettable. First, don’t rush the marinade—giving the chicken time to soak up the buttermilk and spices makes a huge difference in tenderness and flavor. I often let mine sit overnight, especially when prepping for a weekend family dinner. Learn more: Ultimate Pesto Chicken Sandwich Recipe You Need to Try Today
Temperature control during frying is another must. Keeping the oil steady at 350°F means the chicken cooks evenly without becoming greasy or soggy. I use a candy thermometer for precision, a habit I picked up standing on that same stool in Grandma’s kitchen.
Another little secret? Toasting the slider buns with a bit of butter adds richness and prevents them from getting soggy under the juicy chicken and pickles. My husband swears by this step, and honestly, it’s become non-negotiable in our recipe routine.
Finally, don’t skip the pickles. Their tangy crunch cuts through the richness of the fried chicken and brings the whole sandwich to life. I like to use thick-cut dill pickles, but feel free to experiment with spicy or bread-and-butter varieties for different flavor profiles.
Serving Suggestions and Pairings
These Fried Pickle Chicken Sandwich Sliders are a meal in themselves, but pairing them with the right sides can elevate your dinner table even more. One of my favorite combos is a simple coleslaw—its crisp, refreshing bite complements the sliders perfectly and adds a dash of color to the plate.
If you’re hosting a casual gathering, consider serving these sliders alongside crispy sweet potato fries or a vibrant cucumber salad. For something cozy, a bowl of homemade tomato soup warms the soul and pairs beautifully with the tangy chicken flavors.
Because food is about connection, I love setting the table with little bowls of extra pickles, spicy mayo, or even a drizzle of honey mustard. It invites everyone to customize their sliders, turning the meal into a shared experience full of smiles and stories.
Storage and Reheating Tips
Life gets busy, and sometimes you’ll have leftovers. These sliders keep really well if stored properly. Wrap each slider individually or place them in an airtight container to preserve freshness. Refrigerate for up to 2 days.
To reheat, I recommend warming the chicken in a 350°F oven for about 10 minutes to bring back the crispiness. You can toast the buns separately or together on a baking sheet for a couple of minutes. Avoid microwaving if you want to keep that delightful crunch intact.
If you prefer, you can also freeze the fried chicken pieces (without buns) after frying. Once cooled, place them in a freezer-safe bag and freeze for up to 1 month. When ready, bake them in a 375°F oven for 15-20 minutes until hot and crispy again.
Frequently Asked Questions
What are the main ingredients for Fried Pickle Chicken Sandwich Sliders?
The main ingredients for Fried Pickle Chicken Sandwich Sliders include the items listed in our ingredients section above. Each ingredient plays a crucial role in achieving the perfect flavor and texture.
How long does it take to make Fried Pickle Chicken Sandwich Sliders?
The total time to make Fried Pickle Chicken Sandwich Sliders includes both preparation and cooking time. Check the recipe card above for exact timing details.
Can I make Fried Pickle Chicken Sandwich Sliders ahead of time?
Yes, Fried Pickle Chicken Sandwich Sliders can often be prepared in advance. Store it properly in an airtight container in the refrigerator and consume within the recommended timeframe.
What can I serve with Fried Pickle Chicken Sandwich Sliders?
Fried Pickle Chicken Sandwich Sliders pairs well with various sides and accompaniments. Consider the serving suggestions mentioned in the recipe for the best dining experience.
Is Fried Pickle Chicken Sandwich Sliders suitable for special diets?
Depending on the ingredients used, Fried Pickle Chicken Sandwich Sliders may be adapted for various dietary needs. Check the ingredients list and consider substitutions as needed for your dietary requirements.
Final Thoughts
Fried Pickle Chicken Sandwich Sliders are more than just a recipe—they’re a slice of my family’s story, a way to turn ordinary moments into something deliciously memorable. From those early days learning in my grandmother’s kitchen to the hectic weeknights when I’m racing against the clock, these sliders remind me that food is a powerful way to connect, slow down, and show love.
Whether you’re feeding a hungry crowd or treating yourself to a cozy night in, I hope this recipe brings you the same joy and warmth it brings to my table. So grab your apron, fire up the fryer, and let’s make some magic happen—one slider at a time.