Tropical Delight Coconut Lime Bars You Need to Try
There’s something truly magical about the combination of coconut and lime that instantly transports me back to those lazy summer afternoons in my grandmother’s kitchen. Coconut Lime Bars have become one of my favorite treats to whip up when I want something bright, fresh, and just a little indulgent. They remind me of simpler times—standing on a stool next to my grandma, watching her sprinkle a pinch of magic into every dish, while the scent of zesty lime and toasted coconut filled the air. Whether you’re looking for a sweet way to brighten up your afternoon or a dessert that feels like a sunny hug, these bars are my go-to recipe that never fails to bring smiles to my family’s faces.
Table of Contents
Why You’ll Love This Coconut Lime Bars
As a mom juggling the whirlwind of school runs, work deadlines, and dinner prep, I’ve learned that desserts don’t have to be complicated to be memorable. These Coconut Lime Bars are the perfect example—simple ingredients, quick to make, and bursting with flavor. What I love most is how they balance the creamy richness of coconut with the zingy punch of fresh lime juice and zest. It’s a flavor combo that feels both refreshing and comforting, making it a crowd-pleaser in our home.
These bars also embody what RecipeChic is all about: food that connects us. I’ve shared this recipe countless times with friends and family, often reminiscing about those cozy afternoons in grandma’s kitchen. There’s a warmth that comes from making something by hand, especially when it’s meant to be shared. Plus, they’re incredibly versatile—great for a picnic, a casual dessert after dinner, or even as a little treat for yourself when you need a break from the chaos.
Ingredients You’ll Need for This Coconut Lime Bars
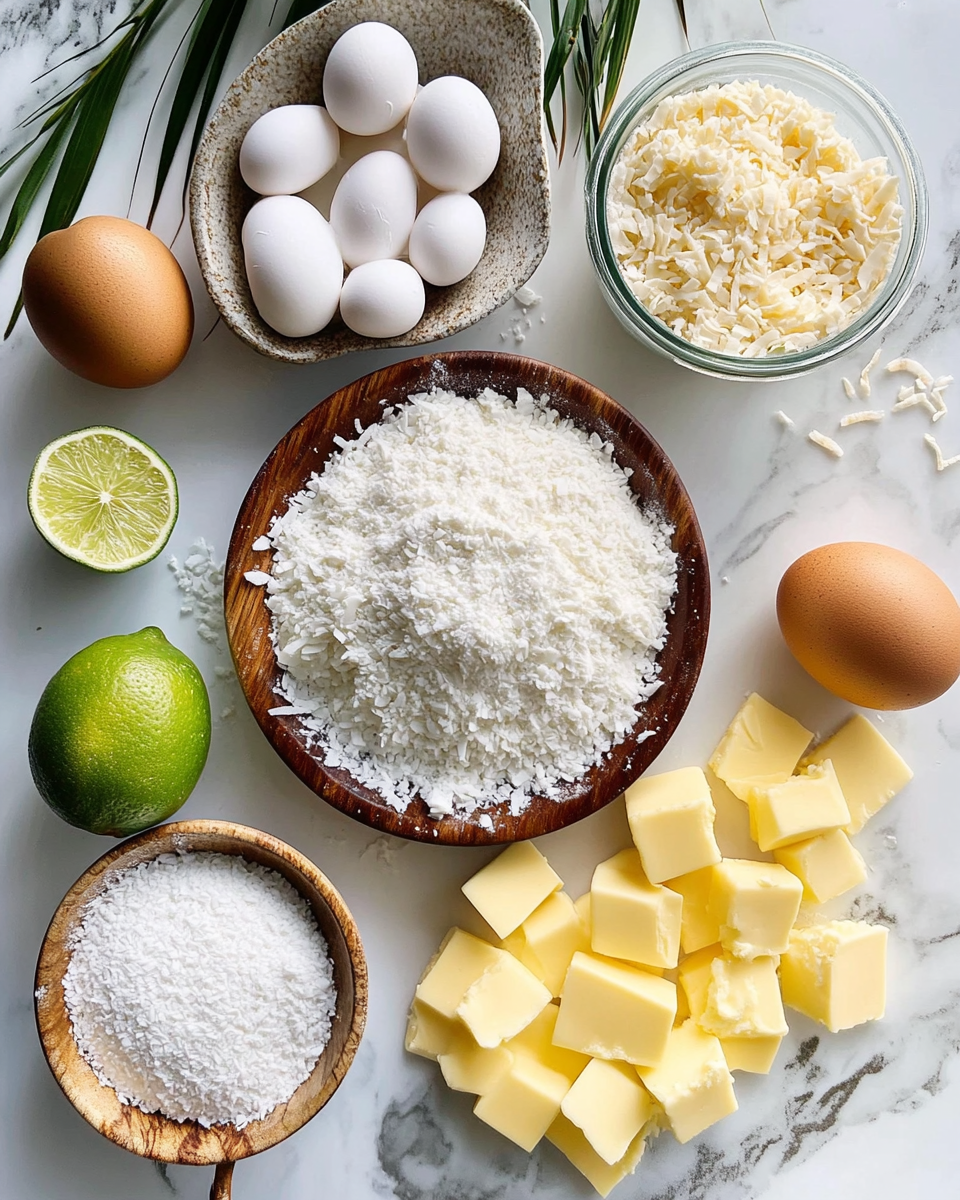
- 1 1/2 cups all-purpose flour
- 1/2 cup shredded unsweetened coconut (plus extra for topping)
- 1/2 cup powdered sugar
- 1/4 teaspoon salt
- 3/4 cup unsalted butter, cold and cubed
- 3 large eggs
- 1 1/4 cups granulated sugar
- 1/4 cup freshly squeezed lime juice (about 2 limes)
- 1 tablespoon lime zest (from about 2 limes)
- 2 tablespoons all-purpose flour
- 1 teaspoon vanilla extract
If you want to switch things up, using coconut oil instead of butter can add a subtle tropical note, though the texture will be a bit different. For a gluten-free version, substitute the flour with a 1:1 gluten-free baking blend—just make sure it has xanthan gum for structure. And if fresh limes aren’t available, bottled lime juice works in a pinch, but fresh zest really elevates the brightness.
Nutrition Facts
- Calories: Approximately 250 per serving (based on 12 bars)
- Protein: 3g
- Fat: 14g
- Carbohydrates: 28g
- Fiber: 1g
- Sugar: 18g
- Sodium: 90mg
While these Coconut Lime Bars aren’t exactly health food, I find their fresh ingredients and homemade touch a comforting middle ground—especially compared to store-bought sweets loaded with preservatives. Plus, sharing a small bar with my family feels like a sweet celebration rather than overindulgence. Balance, after all, is key in my kitchen and life.
Print
Tropical Delight Coconut Lime Bars You Need to Try
Learn how to make delicious Coconut Lime Bars. Easy recipe with step-by-step instructions.
- Total Time: 45 minutes
- Yield: 4 servings 1x
Ingredients
- 1 1/2 cups all-purpose flour
- 1/2 cup shredded unsweetened coconut (plus extra for topping)
- 1/2 cup powdered sugar
- 1/4 teaspoon salt
- 3/4 cup unsalted butter, cold and cubed
- 3 large eggs
- 1 1/4 cups granulated sugar
- 1/4 cup freshly squeezed lime juice (about 2 limes)
- 1 tablespoon lime zest (from about 2 limes)
- 2 tablespoons all-purpose flour
- 1 teaspoon vanilla extract
If you want to switch things up, using coconut oil instead of butter can add a subtle tropical note, though the texture will be a bit different. For a gluten-free version, substitute the flour with a 1:1 gluten-free baking blend—just make sure it has xanthan gum for structure. And if fresh limes aren’t available, bottled lime juice works in a pinch, but fresh zest really elevates the brightness.
Instructions
- Preheat your oven to 350°F and line a 9×9-inch baking pan with parchment paper, leaving some overhang for easy removal later.
- In a large bowl, combine 1 1/2 cups flour, 1/2 cup shredded coconut, powdered sugar, and salt for the crust.
- Add the cold, cubed butter and use a pastry cutter or your fingertips to blend until the mixture resembles coarse crumbs. This step always reminds me of standing on that kitchen stool, feeling the buttery texture between my fingers—it’s a small moment of connection to the past.
- Press the crust mixture evenly into the prepared pan, making sure to pack it firmly to create a solid base. Bake for 18-20 minutes, until the edges turn a light golden brown.
- While the crust bakes, whisk together the eggs, granulated sugar, lime juice, lime zest, 2 tablespoons flour, and vanilla extract in a medium bowl until smooth and slightly frothy.
- Once the crust is out of the oven, carefully pour the lime filling over the hot crust and return the pan to the oven.
- Bake for an additional 20-25 minutes, or until the filling is set but still slightly jiggly in the center. This balance is key for that luscious, melt-in-your-mouth texture that got my kids hooked from the very first bite.
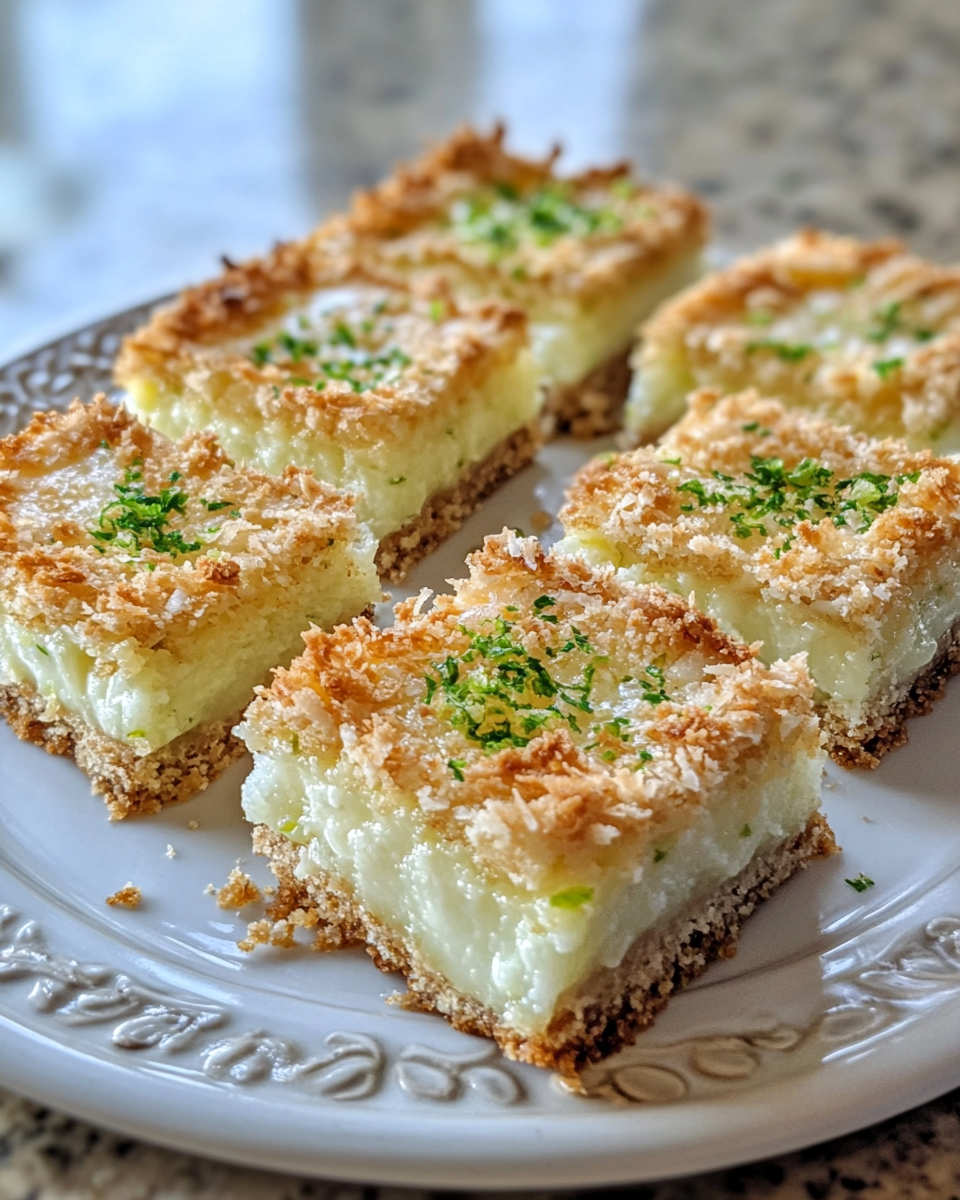
- Remove from oven and let cool completely on a wire rack. Once cooled, sprinkle a little extra shredded coconut on top for a pretty, toasty finish.
- Chill in the fridge for at least 2 hours before slicing into bars. This resting time helps the flavors meld and the bars to firm up perfectly.
One personal tip? I always make a double batch when I have the time. Not only does it save me the hassle later, but it also means we have plenty to share with neighbors and friends—because food is one of the simplest ways I say “I love you.”
- Prep Time: 15 minutes
- Cook Time: 30 minutes
- Category: Main Dish
- Method: Cooking
- Cuisine: International
Steps to Create Your Coconut Lime Bars
- Preheat your oven to 350°F and line a 9×9-inch baking pan with parchment paper, leaving some overhang for easy removal later.
- In a large bowl, combine 1 1/2 cups flour, 1/2 cup shredded coconut, powdered sugar, and salt for the crust.
- Add the cold, cubed butter and use a pastry cutter or your fingertips to blend until the mixture resembles coarse crumbs. This step always reminds me of standing on that kitchen stool, feeling the buttery texture between my fingers—it’s a small moment of connection to the past.
- Press the crust mixture evenly into the prepared pan, making sure to pack it firmly to create a solid base. Bake for 18-20 minutes, until the edges turn a light golden brown.
- While the crust bakes, whisk together the eggs, granulated sugar, lime juice, lime zest, 2 tablespoons flour, and vanilla extract in a medium bowl until smooth and slightly frothy.
- Once the crust is out of the oven, carefully pour the lime filling over the hot crust and return the pan to the oven.
- Bake for an additional 20-25 minutes, or until the filling is set but still slightly jiggly in the center. This balance is key for that luscious, melt-in-your-mouth texture that got my kids hooked from the very first bite.
- Remove from oven and let cool completely on a wire rack. Once cooled, sprinkle a little extra shredded coconut on top for a pretty, toasty finish.
- Chill in the fridge for at least 2 hours before slicing into bars. This resting time helps the flavors meld and the bars to firm up perfectly.
One personal tip? I always make a double batch when I have the time. Not only does it save me the hassle later, but it also means we have plenty to share with neighbors and friends—because food is one of the simplest ways I say “I love you.”
Tips for Making the Best Coconut Lime Bars
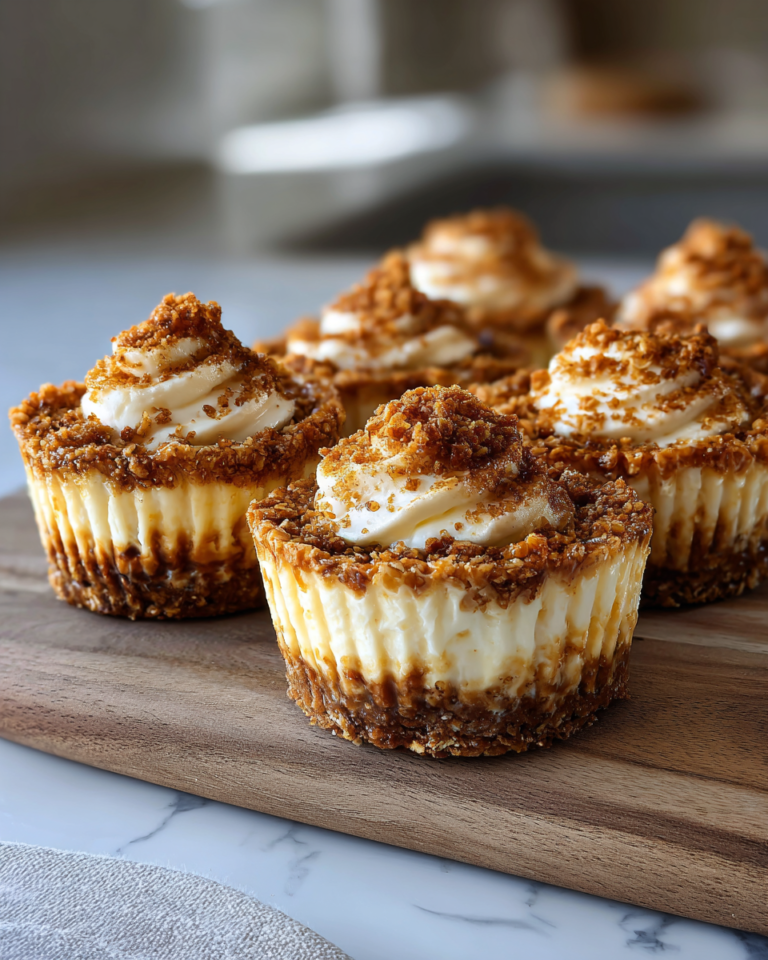
Over the years, I’ve learned a few tricks that really make these bars shine. First, don’t rush the zesting—using fresh lime zest is where the bright, vibrant flavor truly comes from. I like to zest the limes first, then squeeze the juice, so I don’t accidentally remove the zest with the juice. Learn more: Irresistible Mini Pineapple Upside-down Cheesecakes You Need to Try
Secondly, when working with the crust, keep your butter cold until the last moment. It creates that perfect crumbly texture that bakes into a crisp, buttery base. If your kitchen is warm, pop the crust mixture in the fridge for 10 minutes before pressing it into the pan.
And here’s a little secret I learned from my grandma’s kitchen: when baking the filling, it’s okay if the center jiggles slightly when you take it out of the oven. It will continue to set as it cools, giving you that silky, custard-like texture that everyone loves.
“Cooking became my way to slow down, connect, and show love.” This recipe is a testament to that—simple, heartfelt, and full of flavor.
Serving Suggestions and Pairings
These Coconut Lime Bars are delightful on their own, but if you want to take them to the next level, here are some of my favorite ways to serve them:
- Dust with a little powdered sugar and serve alongside a scoop of vanilla bean ice cream for a perfect summer dessert.
- Top with fresh berries or a few sprigs of mint to add a pop of color and freshness.
- Pair with a cup of lightly brewed green tea or a tangy citrus cocktail for an elegant afternoon treat.
- For a tropical twist, drizzle with a bit of passion fruit syrup or mango puree.
In our house, these bars often show up during weekend gatherings or as a surprise after a long day. They’re a little slice of sunshine that brings everyone together—just like the meals I cherish and share on RecipeChic.
Storage and Reheating Tips
Because life gets busy (and sometimes chaotic), I always like to have these bars ready in the fridge. They store beautifully for up to 4 days in an airtight container. Just be sure to keep them chilled to maintain that perfect texture.
If you want to serve them slightly warm, pop a bar in the microwave for about 10-15 seconds. This softens the coconut topping nicely without melting the filling too much. However, I personally prefer them cold, as the flavors feel more pronounced and refreshing.
For longer storage, you can freeze the bars for up to 2 months. Wrap individual bars tightly in plastic wrap and place in a freezer-safe container. Thaw in the refrigerator overnight before serving.
Frequently Asked Questions
What are the main ingredients for Coconut Lime Bars?
The main ingredients for Coconut Lime Bars include the items listed in our ingredients section above. Each ingredient plays a crucial role in achieving the perfect flavor and texture.
How long does it take to make Coconut Lime Bars?
The total time to make Coconut Lime Bars includes both preparation and cooking time. Check the recipe card above for exact timing details.
Can I make Coconut Lime Bars ahead of time?
Yes, Coconut Lime Bars can often be prepared in advance. Store it properly in an airtight container in the refrigerator and consume within the recommended timeframe.
What can I serve with Coconut Lime Bars?
Coconut Lime Bars pairs well with various sides and accompaniments. Consider the serving suggestions mentioned in the recipe for the best dining experience.
Is Coconut Lime Bars suitable for special diets?
Depending on the ingredients used, Coconut Lime Bars may be adapted for various dietary needs. Check the ingredients list and consider substitutions as needed for your dietary requirements.
Final Thoughts
There’s a special kind of joy that comes from making Coconut Lime Bars—a joy rooted in tradition, family, and the simple pleasure of sharing something homemade. This recipe is more than just a dessert; it’s a bridge between the past and present, a sweet moment to slow down and savor amidst the busy rhythms of life.
Every time I bake these bars, I’m reminded of those early days in my grandmother’s kitchen and the way food has always been the thread that ties our family together. Whether you’re a busy parent like me, a food lover looking for a fresh twist, or someone who just wants to create a little magic in their own kitchen, I hope these bars bring you as much happiness as they bring my family.
So go ahead—grab those limes, dust off your baking pan, and make a batch. Pull up a chair, take a bite, and savor the moment. Because here at RecipeChic, it’s all about living, loving, and sharing stories through every bite.